

Amazon Connect is a self-service, cloud-based contact center service that makes it easy for any business to deliver better customer service at a lower cost. Amazon Connect is based on the same contact center technology used by Amazon customer service associates worldwide to power millions of customer conversations. The self-service graphical interface in Amazon Connect makes it easy for non-technical users to design contact flows, manage agents, and track performance metrics – no specialized skills required. There are no up-front payments or long-term commitments and no infrastructure to manage with Amazon Connect; customers pay by the minute for Amazon Connect usage plus any associated telephony services.
For more info about Amazon connect, visit the following page:
https://aws.amazon.com/connect/
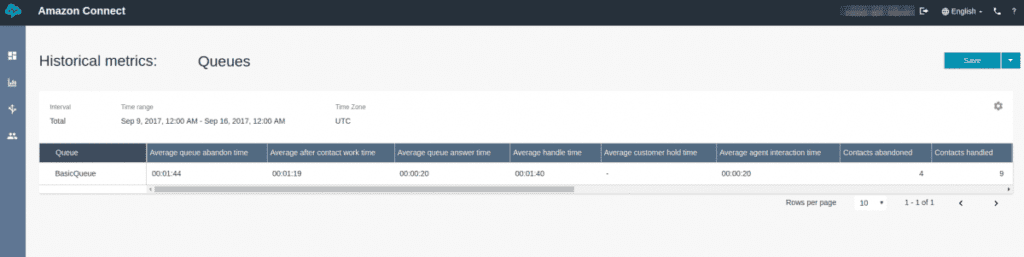
Amazon Connect enables you to generate and have reports like this:
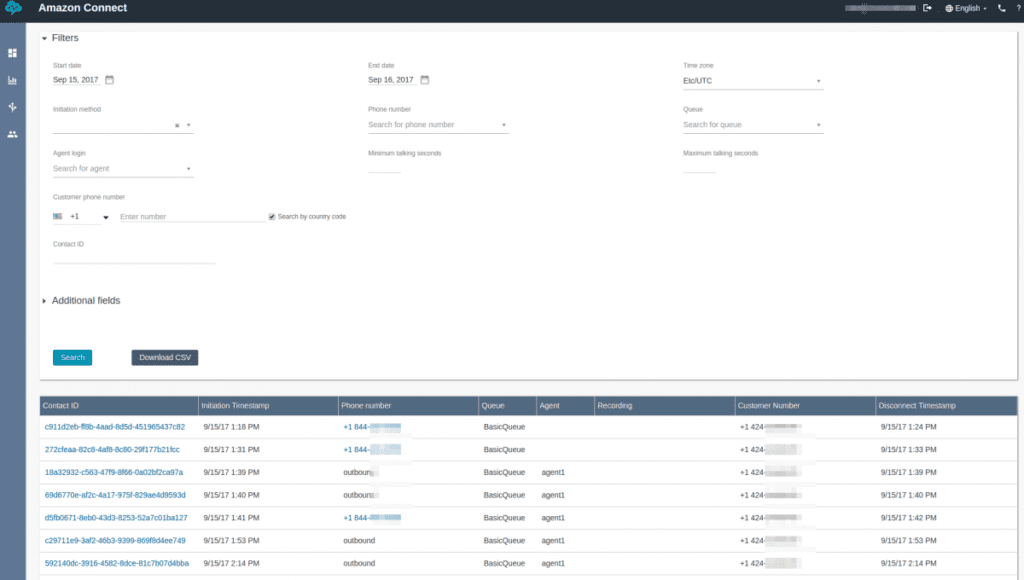
And in the Contact Search section, you can have access to the details of the calls, as you see below.
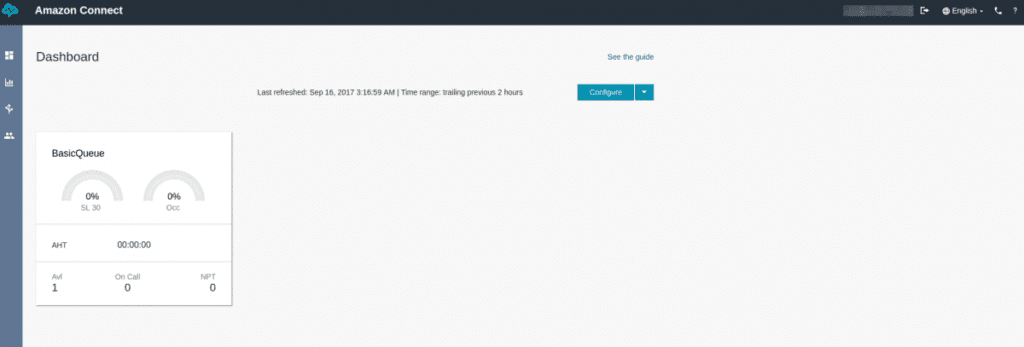
We also have a widget in the Dashboard, which we can set it up as shown below.
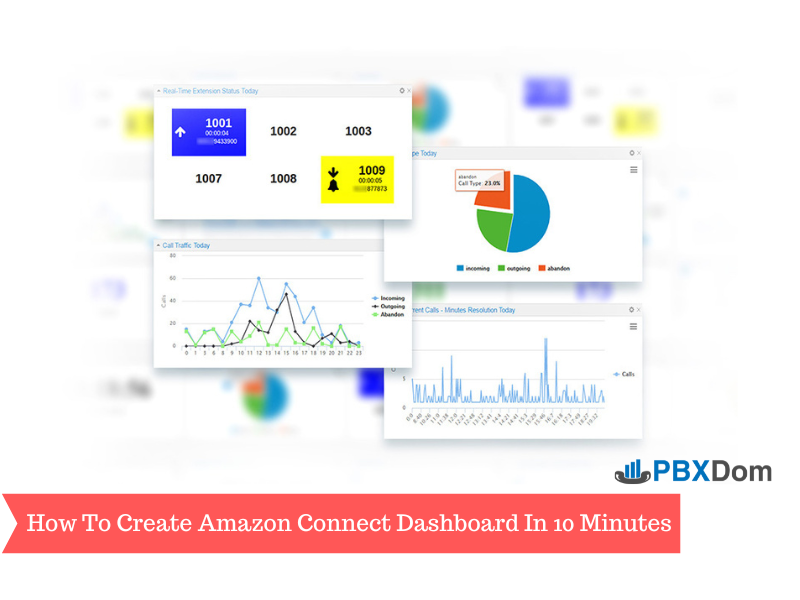
In this article, I will show you how you can create Amazon Connect Dashboard within only 10 Minutes. So, let’s get started and follow along with my instructions step-by-step.
Step 1:
The required settings in the Amazon AWS section are for the sake of having sufficient accessibility. Go ahead and start setting up your AWS Account. But first of all, we need to specify in the Amazon Connect that calls information is stored in an S3 Bucket by the Kinesis Amazon.
For doing so, click on Data streaming on the left-hand side.
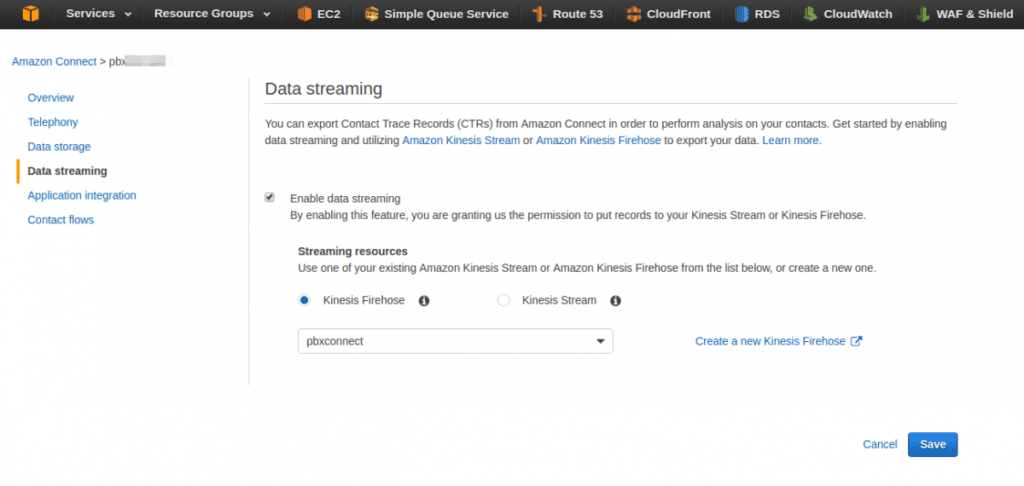
Then you need to check Enable data streaming and select Kinesis Firehose. Click on Create a new Kinesis Firehose. Then up comes the page for creating a new Kinesis.
Step 2:
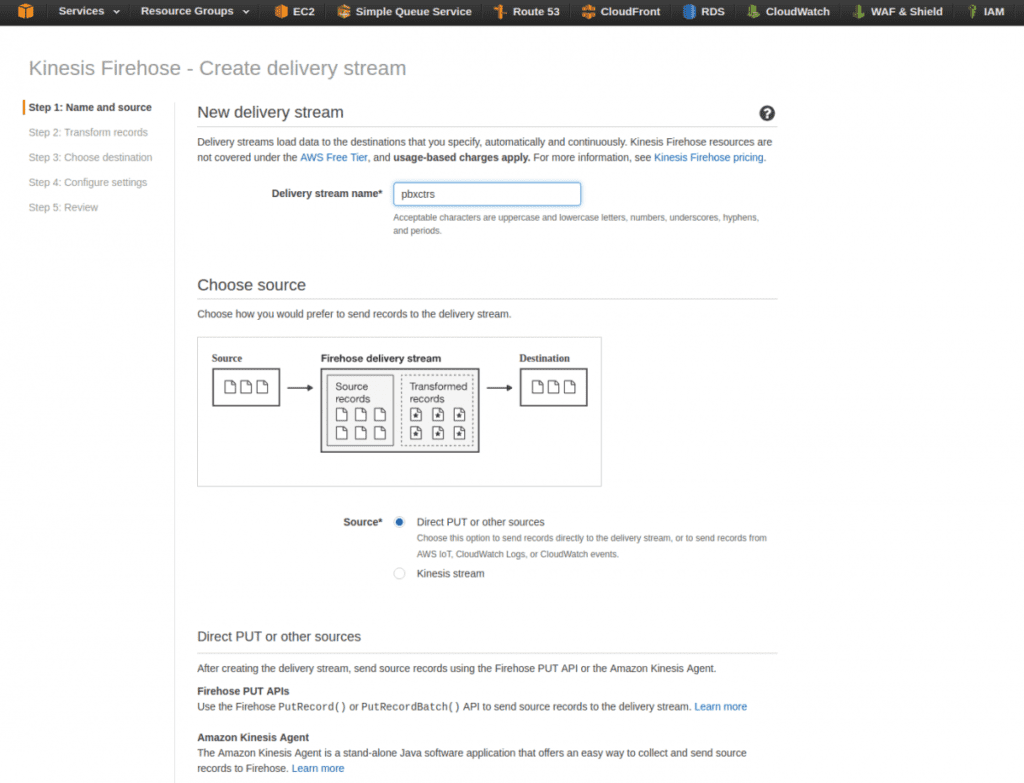
On this page, click on Create Delivery Stream button.
Step 3:
- Enter pbxctrs in the Delivery stream name section.
- Choose Direct PUT or other sources radial icon for the Source.
Scroll down a bit on the page, and for the Destination, choose Amazon S3. Then click on Create new button for creating a new S3 Bucket under the S3 Destination section.
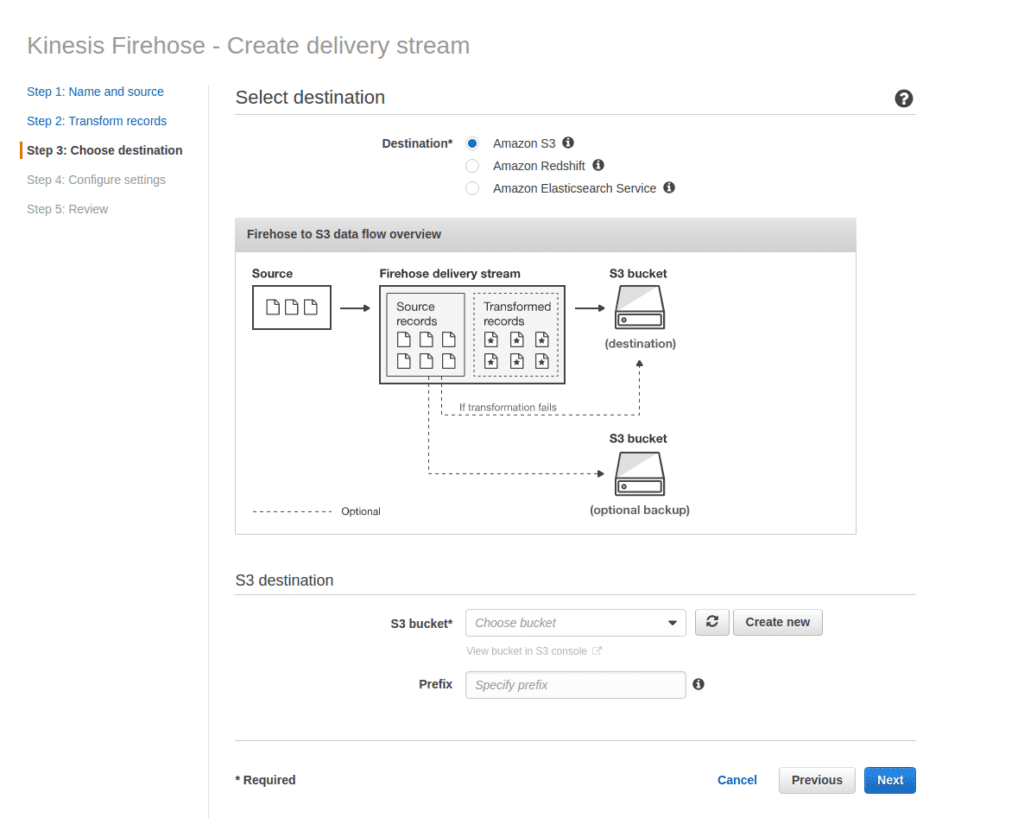
- A new window pops up on the screen. Enter a name for S3 Bucket. You can also choose a region from the Region menu list.
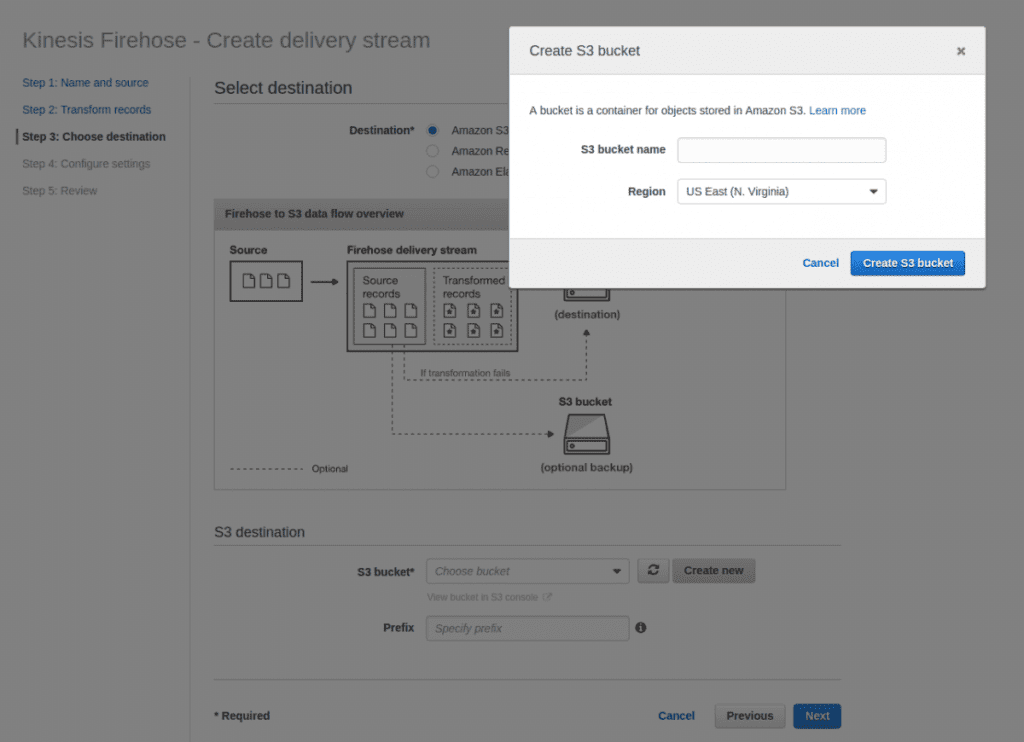
In the S3 Bucket name, enter pbxctrs as the value and click on Create S3 Bucket button.
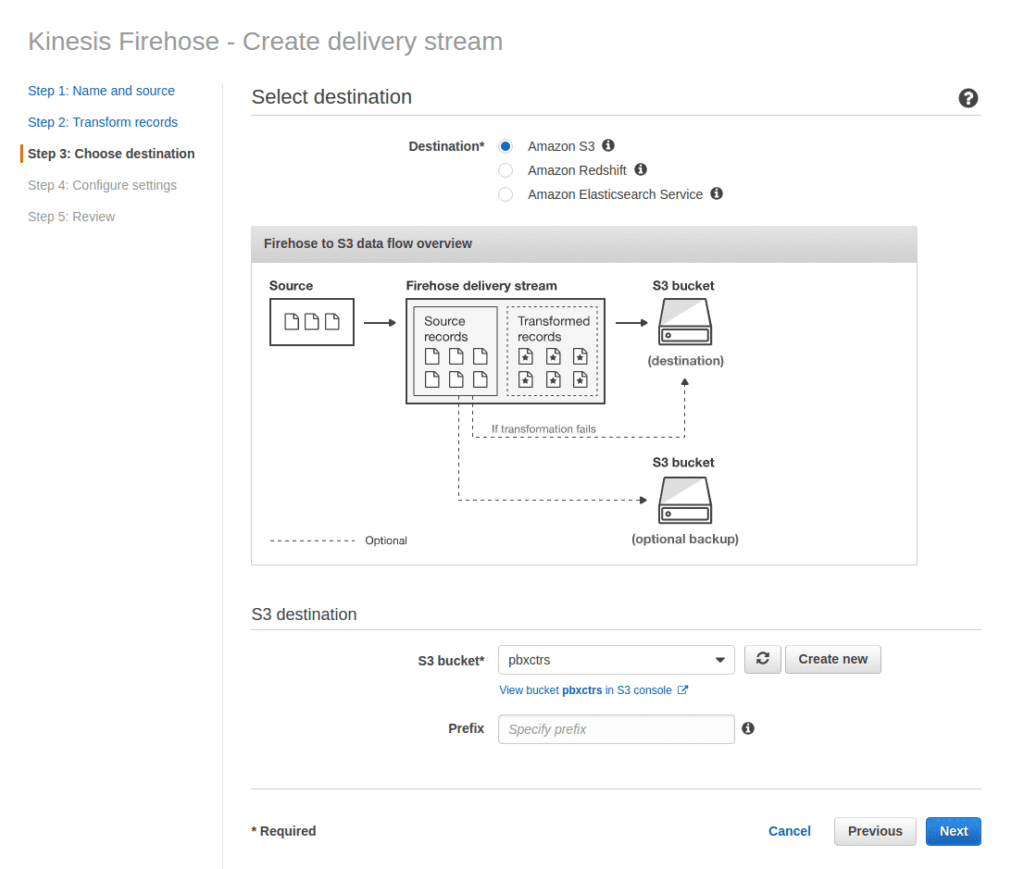
In the end, click on the Next button.
Step 4:
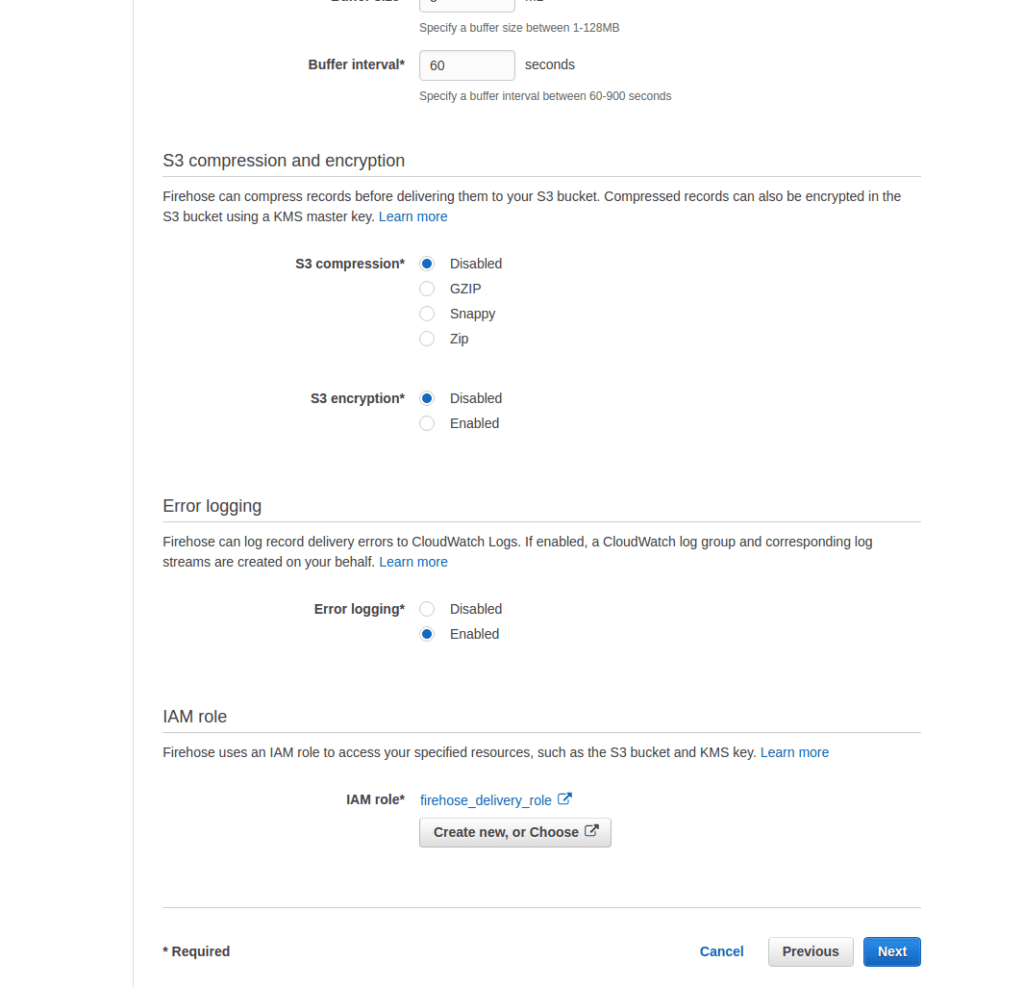
On this page, change the Buffer Interval value to 60. And then scroll to the end of the page.
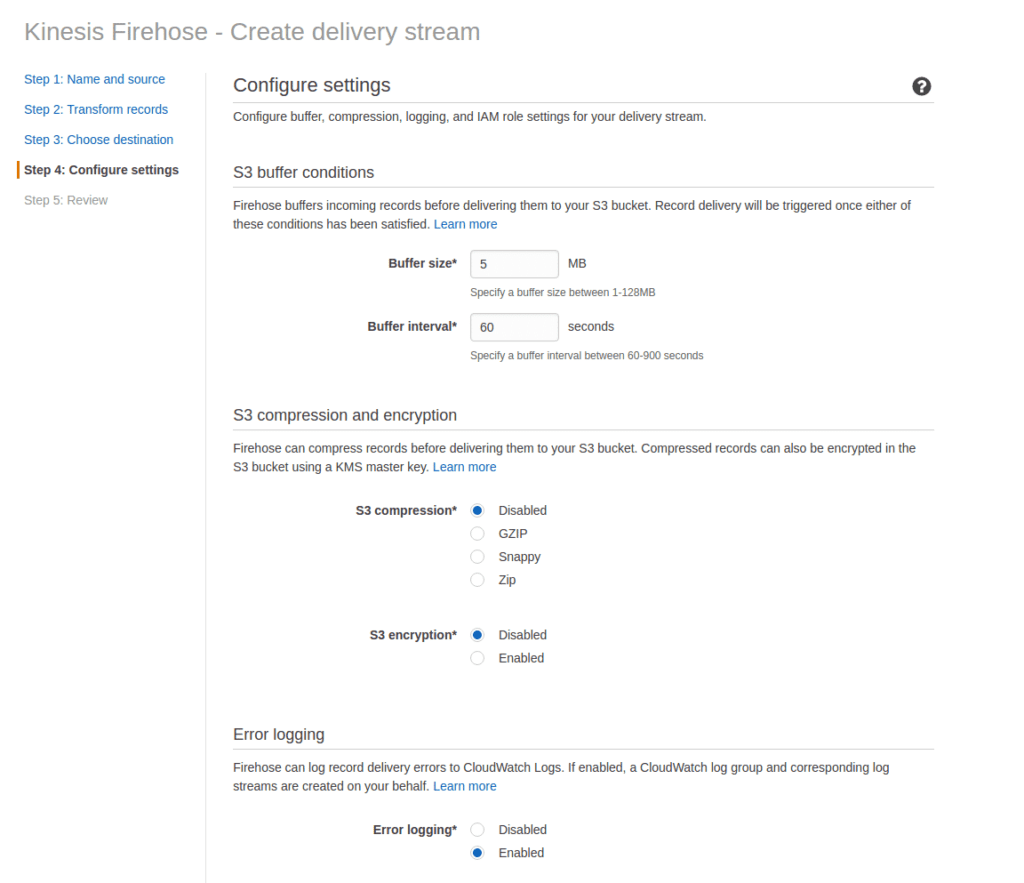
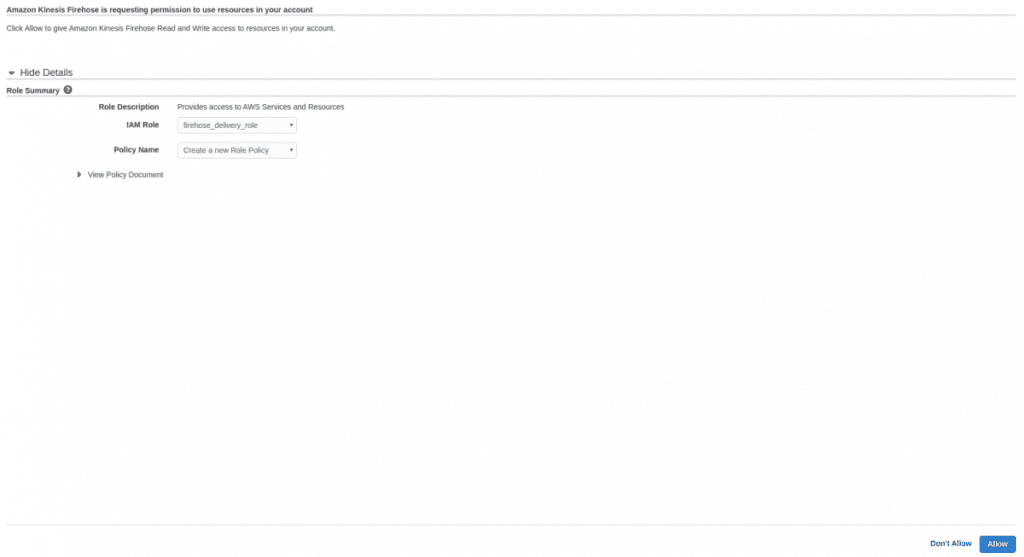
In the IAM Role section, click on Create New, or choose. Then up comes the IAM accessibility settings page.
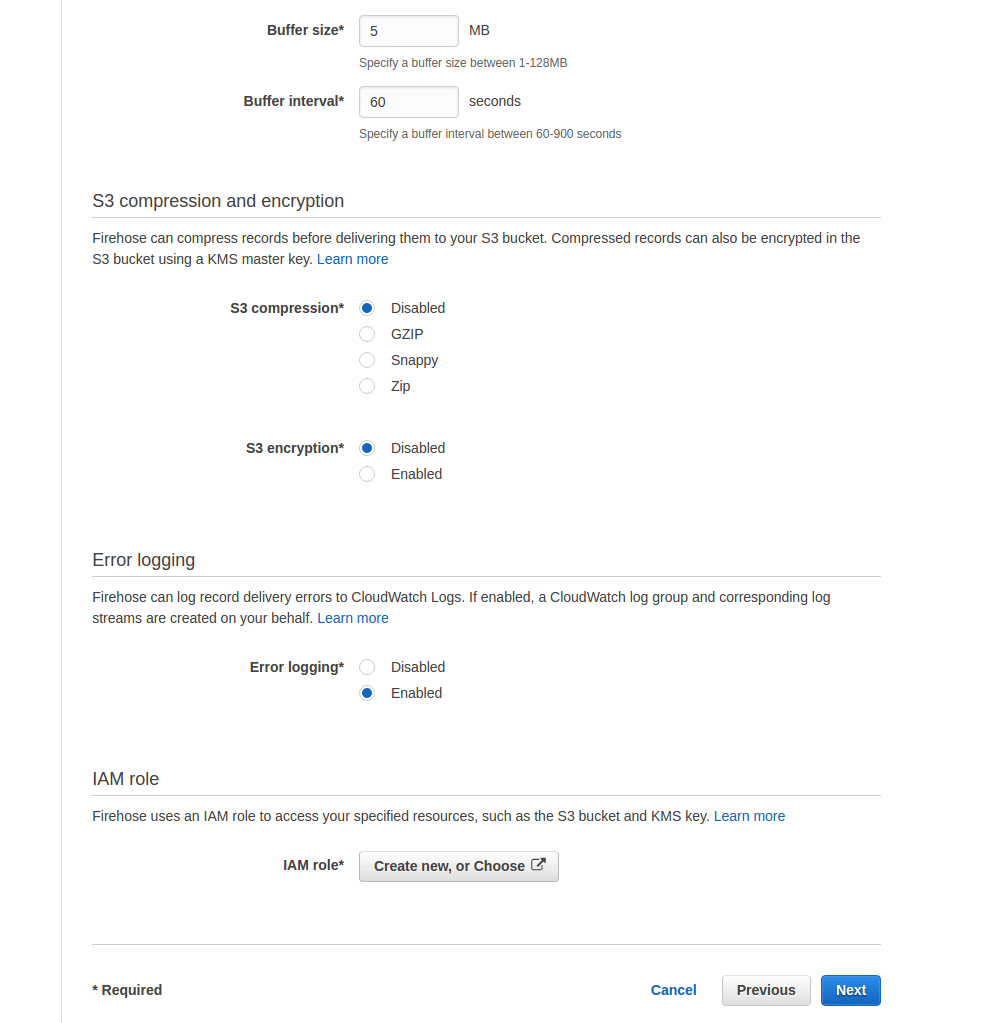
In the new window, all it takes is clicking on the Allow button to gain accessibility based on the default setting.
To finish the process and have the final review, click on the Next.
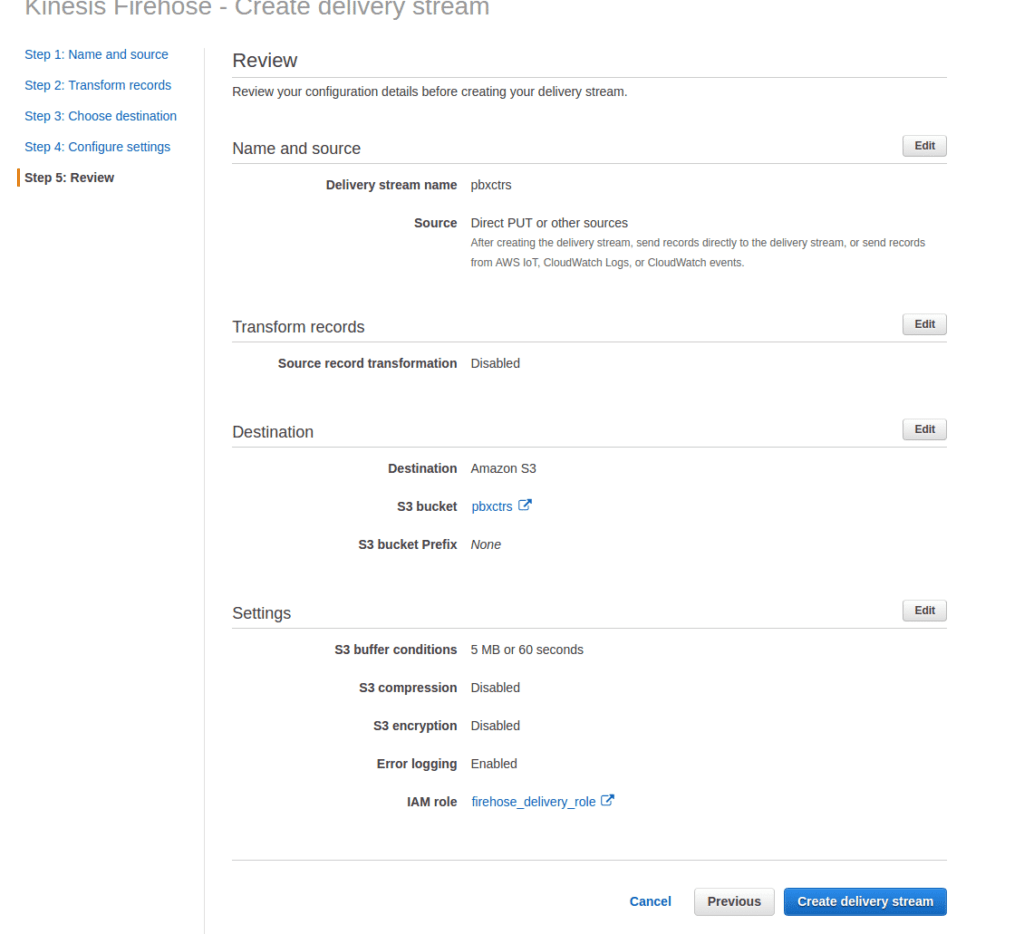
You can review all the settings related to creating Delivery Stream on this page, and if necessary, you can change them. Click on Create Delivery Stream after making sure that every setting is the way it should be so that you could return to Data Streaming settings on Amazon Connect.
Step 5:
On this page, all it takes is selecting pbxctrs we created for Kinesis Stream and clicking on the Save button.
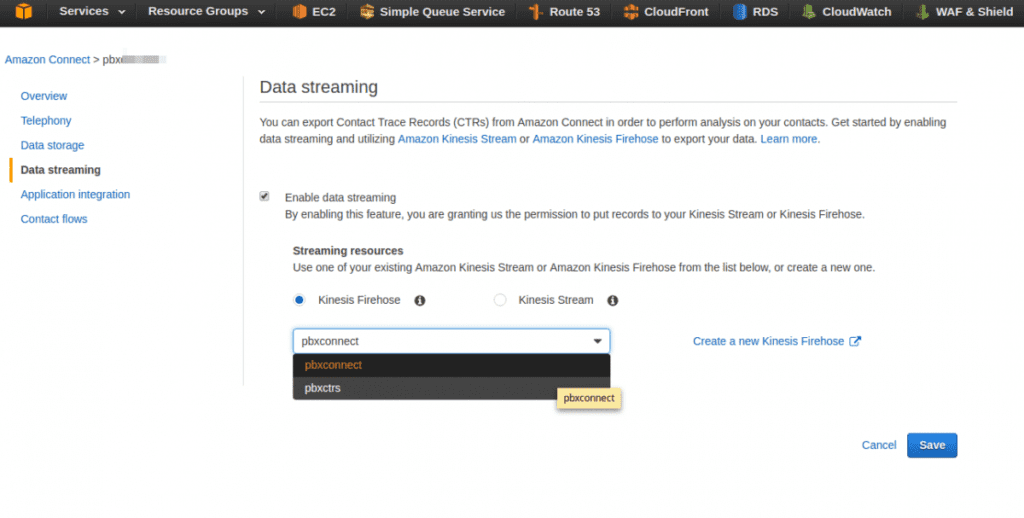
Up until this point, we could activate Data Streaming on Amazon Connect so that calls information can be sent to a Kinesis Stream to be stored in separate files every minute in S3 Bucket that we created earlier.
To ensure that you could set up the settings correctly, all it takes is to open the S3 Bucket, which we created to save the calls log through AWS council and make a few calls. Then you must see the calls files are being added in S3 Bucket in less than a minute.
After noticing the files in S3 Bucket, then it means that you set up the settings correctly and can confidently move on to the next step.
Step 6:
At this stage, we need to enable PBXDom Collector software to have access to the created S3 Bucket, in which the call’s information is saved. To reach out to the S3 Bucket, go ahead to the IAM management section of your AWS account and then go to the Policies section.
On this page, click on Create Policy button.
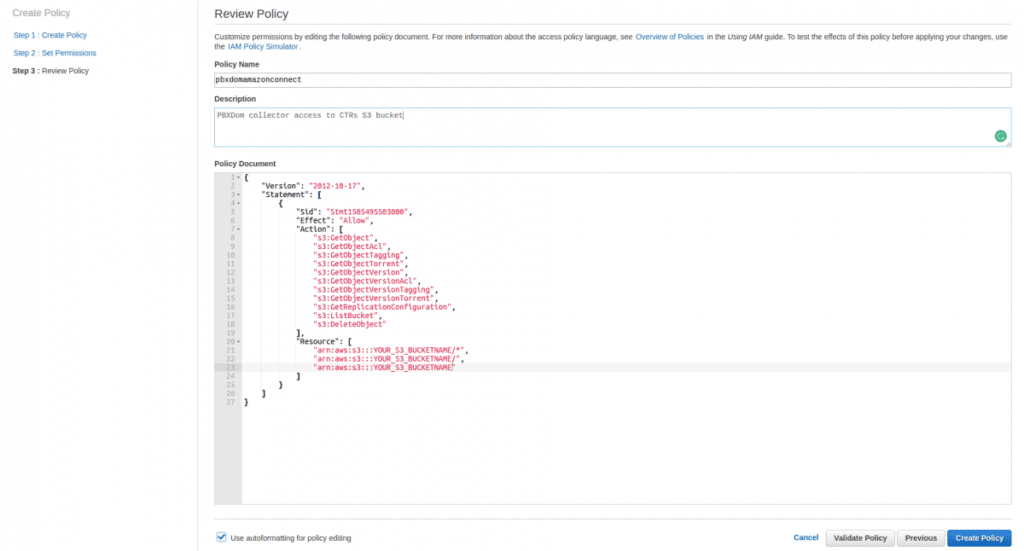
Step 7:
On the Policies section, enter pbxdomamazonconnect in the Policy Name field.
In the Description section, you can write some descriptive text about this new policy.
And in the Policy document section, paste the following text:
{
"Version": "2012-10-17",
"Statement": [
{
"Sid": "Stmt1505495503000",
"Effect": "Allow",
"Action": [
"s3:GetObject",
"s3:GetObjectAcl",
"s3:GetObjectTagging",
"s3:GetObjectTorrent",
"s3:GetObjectVersion",
"s3:GetObjectVersionAcl",
"s3:GetObjectVersionTagging",
"s3:GetObjectVersionTorrent",
"s3:GetReplicationConfiguration",
"s3:ListBucket",
"s3:DeleteObject"
],
"Resource": [
"arn:aws:s3:::YOUR_S3_BUCKETNAME/*",
"arn:aws:s3:::YOUR_S3_BUCKETNAME/",
"arn:aws:s3:::YOUR_S3_BUCKETNAME"
]
}
]
}
Pay attention to change the string part YOUR_S3_BUCKETNAMET with the real name S3 Bucket you created to save CTRs. And then click on Create Policy button.
We could successfully create the necessary Policies to enable PBXDom Collector software to connect S3 Bucket stored data. Next, we need to create an AccessKey and Secretkey and then assign our created policy to it.
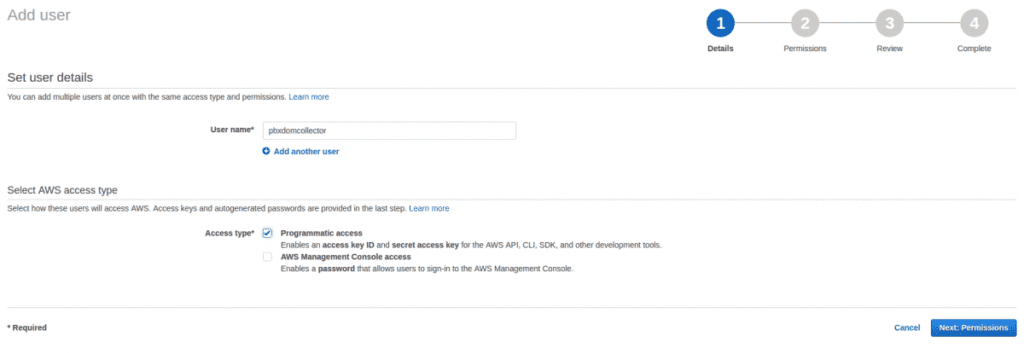
Step 8:
To create a new User, click on Add user. Here in this section, enter pbxdomcollector for the Username field.
Then, down below in the Access Type section, check the Programmatic access checkbox and then click on the Next: Permission button.
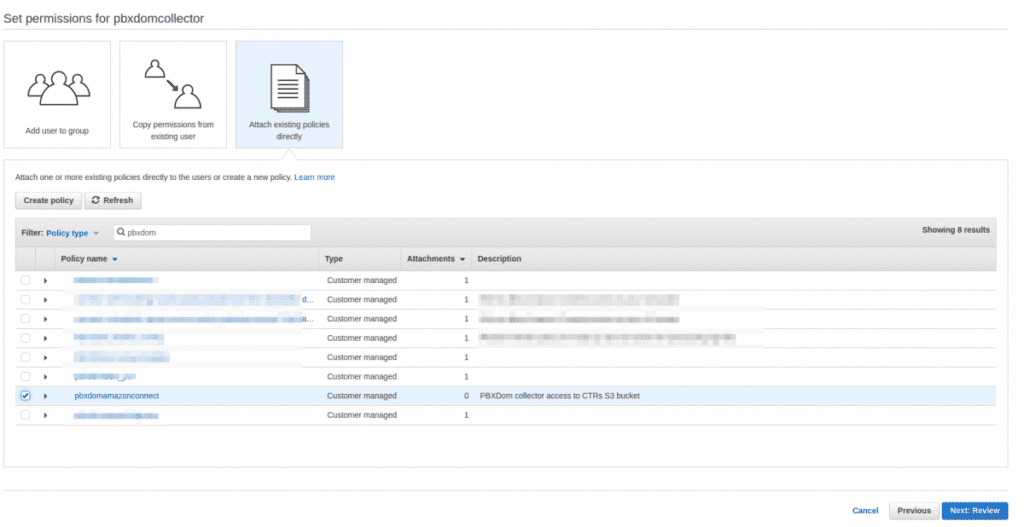
Step 9:
We need to select the policy that we created before and assign it to a user on this page.
Firstly, click on Attach existing policies directly, and enter pbxdom word in the search field so that the list of policies gets filtered.
Then find and select the pbxdomamazonconnect policy which we had created before. Click on the Next: review button at the bottom of the list.
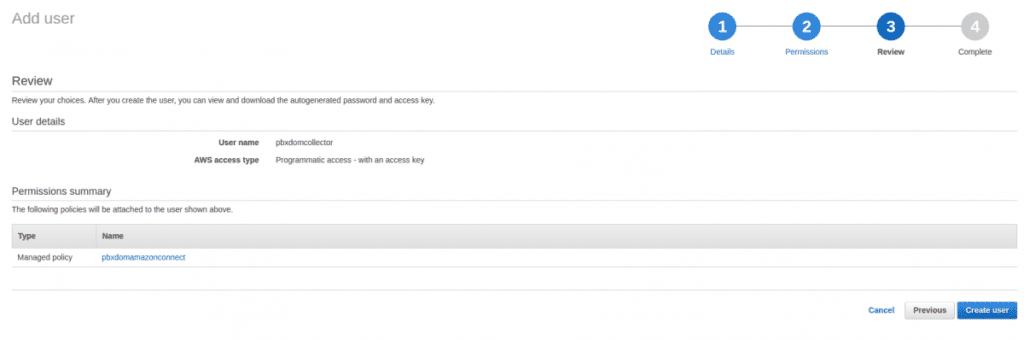
Step 10:
Review all the information on this page. After making sure that it is accurate, then click on Create user button.
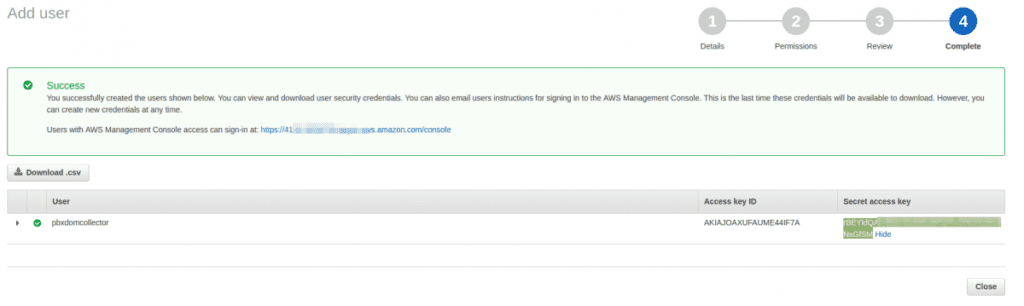
Step 11:
On this page, you can review the Access key and Secret key for accessing PBXDom Collector software. I do recommend you save this information in a Text file. Since later on, you will need it to set up your PBXDom Collector software.
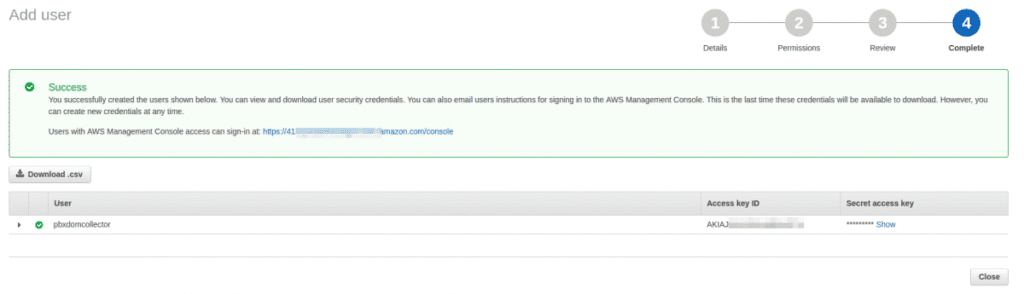
To see the Secret key, click on the Show option.
So far, we are done with half of the most difficult steps. But the good news is that we are completely done with AWS side settings. In short, we went through all of these steps up above:
- Activating Data Streaming on Amazon Connect and saving calls information in S3 Buckets through Kinesis firebase
- Creating a policy for PBXDom Collector software to access S3 Bucket, in which CTRs are saved
- Creating Access key and Secret key to access AWS
Now, in the next, we’re ready to begin setting up the PBXDom service.
Step 12:
Sign up in PBXDom from the following link:
https://www.pbxdom.com/pricing/
Step 13:
After confirming your account by clicking on the link sent to your email, you will be redirected to the setup page on the PBXDom website.
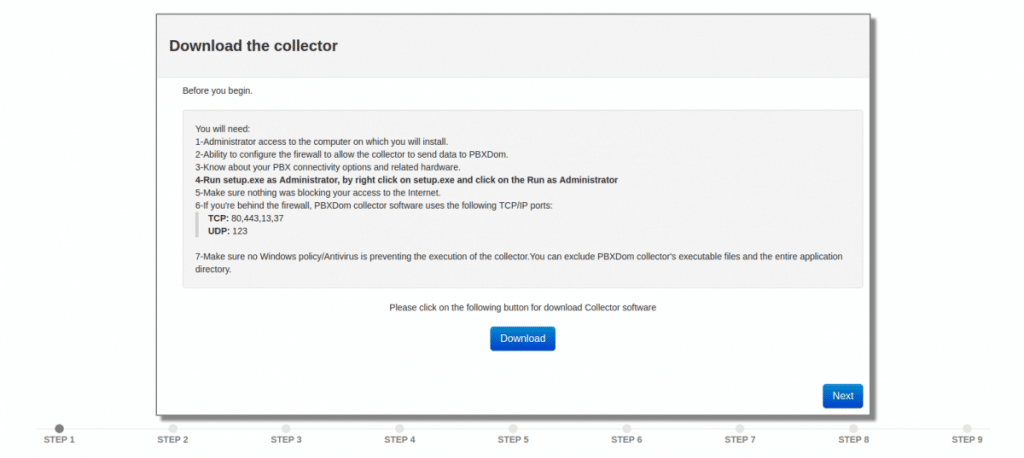
Step 14:
Before beginning, you will need:
1-Administrator access to the computer on which you will install.
2-Ability to configure the firewall to allow the collector to send data to PBXDom.
3-Know about your PBX available connectivity options and needed hardware.
4-Run setup.exe as Administrator by right-clicking on setup.exe and selecting the Run as Administrator.
5-Make sure nothing is blocking your access to the Internet.
6-If you’re behind the firewall, PBXDom collector software uses the following TCP/IP ports:
TCP: 80,443,13,37
UDP: 123
7-Make sure no Windows Policy/Antivirus is preventing the execution of the collector. You can exclude PBXDom collector’s executable files and the entire application directory.
Step 15:
Download the Collector software by click on the Download button and go to the next step.
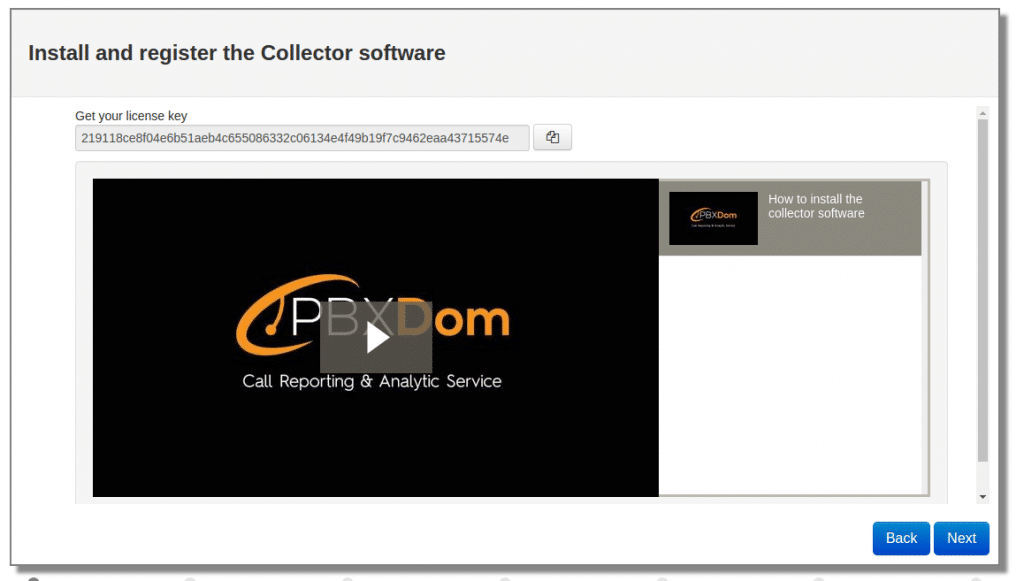
Step 16:
Install collector software, copy your license key, paste it into your collector, and press the register button. After your collector registered successfully, press the start button on your collector.
Please watch the following video to know how to install the collector data.
Step 17:
In the next step, you will see the following window.
If you successfully registered your collector and started it, the PBX collector registration status changes from Not registered to Registered and collector connection status from Not connected to Connected like the following window after a few seconds.
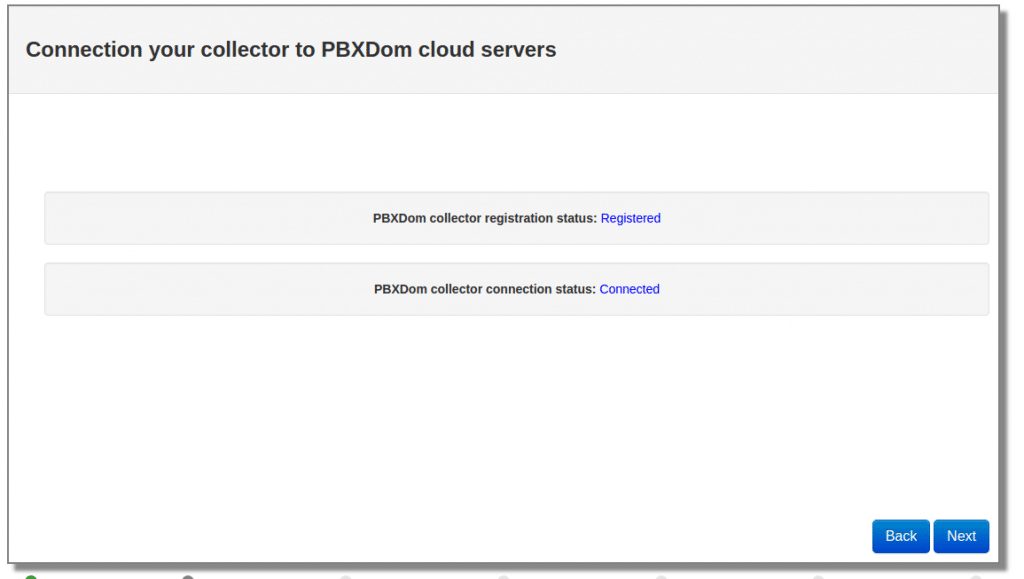
Now you can click on the Next button.
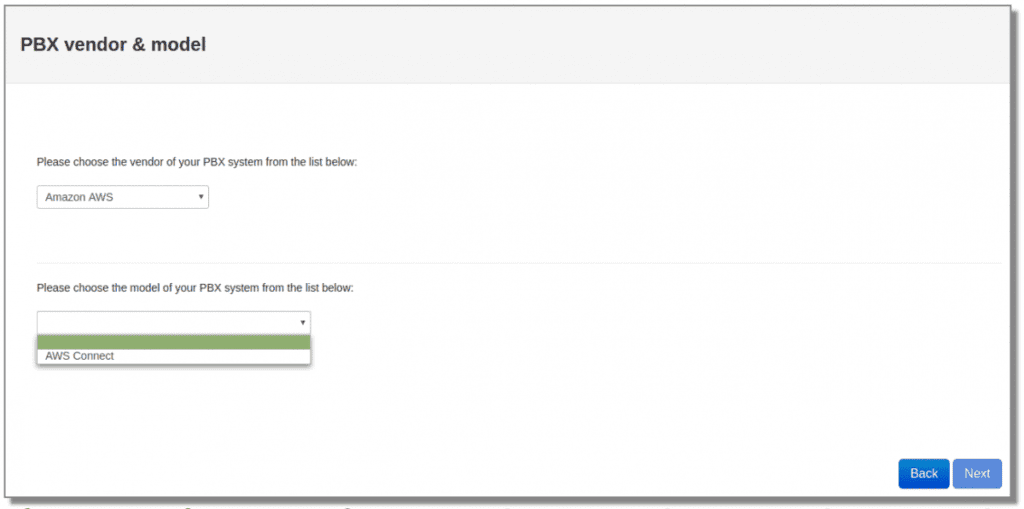
Step 18:
Select Amazon AWS from the vendor list.
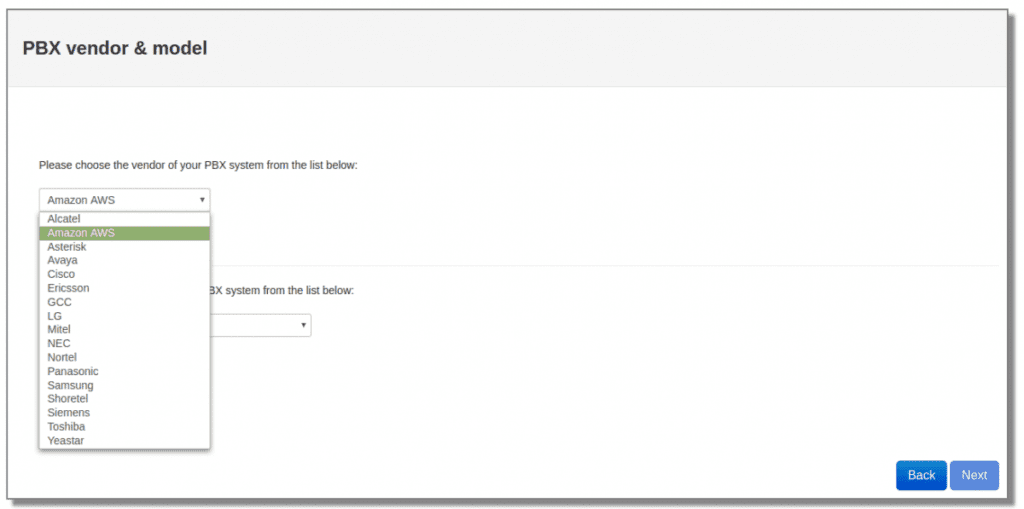
Select Amazon Connect from the model menu list and click on the Next button.
Step 19:
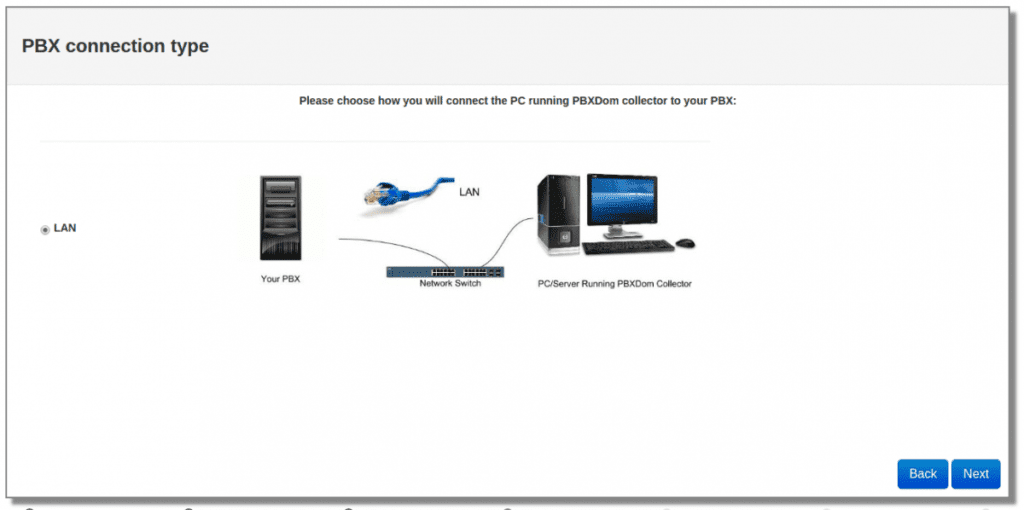
Click on LAN connection and click on the Next button.
Step 20:
Only select your time zone and leave other settings as set by default.
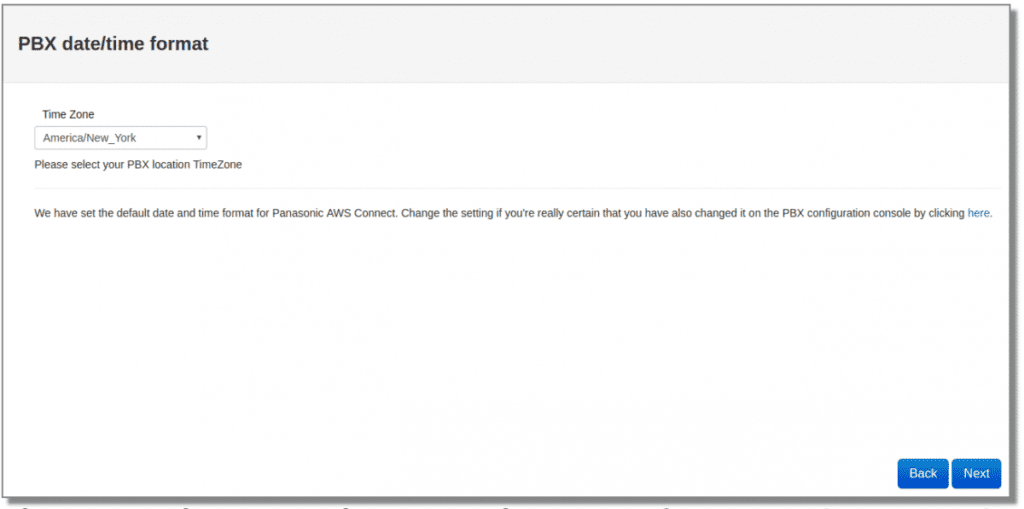
Do NOT change Date and Time formats. They are automatically set for Amazon Connect.
Step 21:
Here in this section, enter the S3 Bucket name, in which the CTRs information is saved. You also need to enter the Access key and Secret key information necessary to gain access to S3 Bucket.
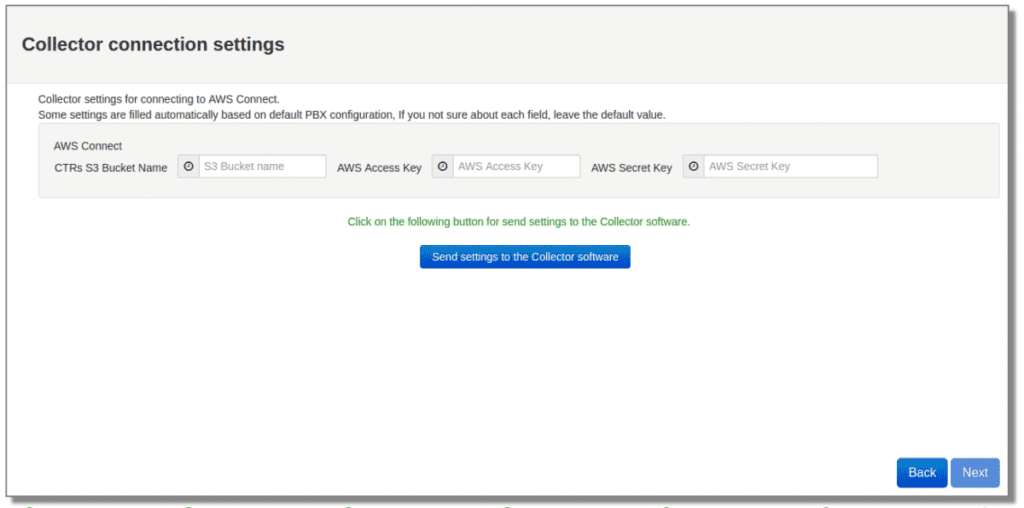
Click on the Next button on the PBXDom wizard.
Step 22:
In the next window, you should wait till all the call data gets loaded to your account.
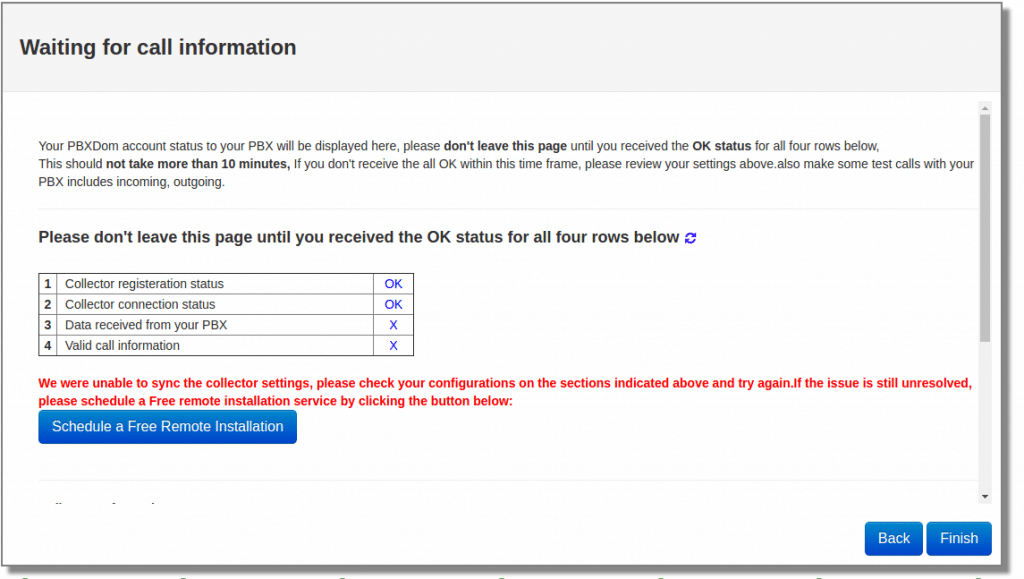
Please don’t leave this page until you receive the OK status for all four rows below,
This should not take more than 10 minutes. If you don’t notice all the OK within this time, please review your settings.
Also, make some test calls with your PBX to include a few incoming, outgoing.
If the issue is still unresolved, please schedule a Free remote installation service by clicking here.
After a few minutes, you should receive 4 OK and windows change to the following message on your screen:
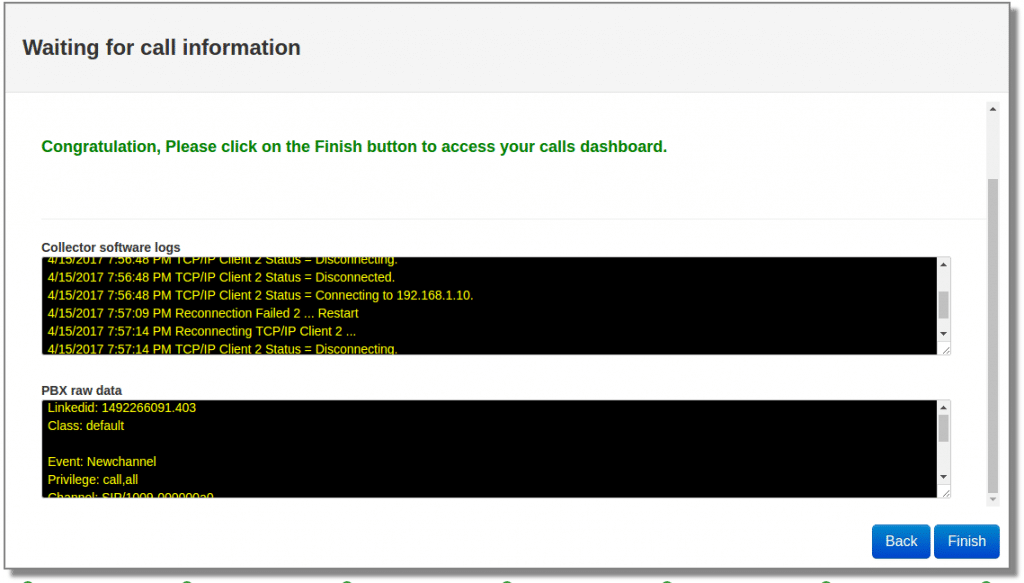
Congratulation, Please click on the Finish button to access your calls dashboard.
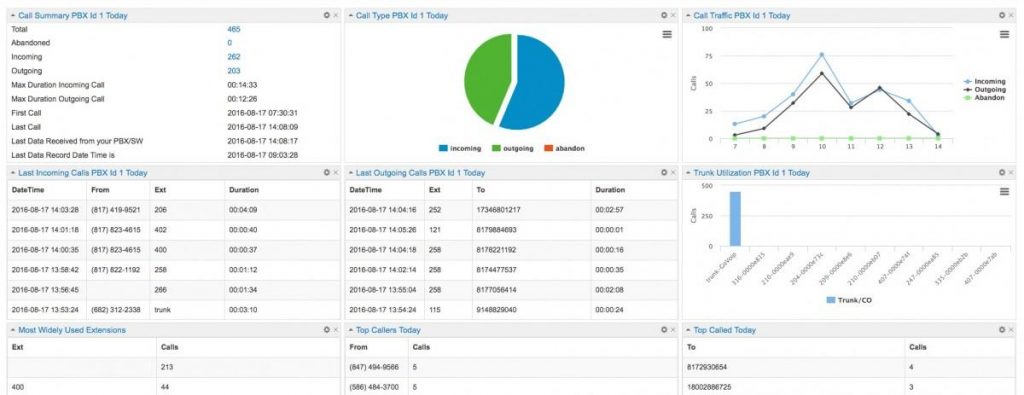
You can make as many as 50 dashboards as you want in the PBXDom. You can add up to 12 widgets in each dashboard from more than 60 available widgets.
Also, you can share a read-only dashboard all across your entire organization.
Finally, you can find a complete set of reports, charts in the reports and chart section.
I hope this article will help you find a straightforward solution for making a dashboard for Amazon Connect.
In the end, I hope that this article was helpful enough to enable you to take advantage of the Amazon Connect service and PBXDom dashboard and reporting features. If you ever run into any issue regarding installing the PBXDom service, please feel free to contact us. We’ll be looking forward to hearing from you.

