
Avaya’s IP500 IP Office is redefining how the business communicates. The Avaya IP Office Family is the latest advancement in converged voice and data technology from Avaya. IP Office combines high-end voice and data applications normally reserved for large enterprises with easy to use tools that allow the smallest of businesses to deliver cutting-edge customer service.
Avaya IP Office IP, 500 with Phone 30 Expansion Module and Digital 30 Expansion ModuleThe IP Office family consists of the IP Office 500 series communications solutions. The Avaya IP Office IP500 V2 is the latest control unit in the IP Office IP500 suite of products, supporting IP Office Release 6.0 and higher. Systems can be expanded through the use of expansion modules.
Avaya IP Office delivers full voice functionality with a comprehensive set of features. The IP Office system can be configured as a voice-only PBX, using a traditional circuit-switched line, or an IP telephony server using high-speed ISDN/PRI dial-up access and/or direct leased line connectivity and/or SIP trunks.
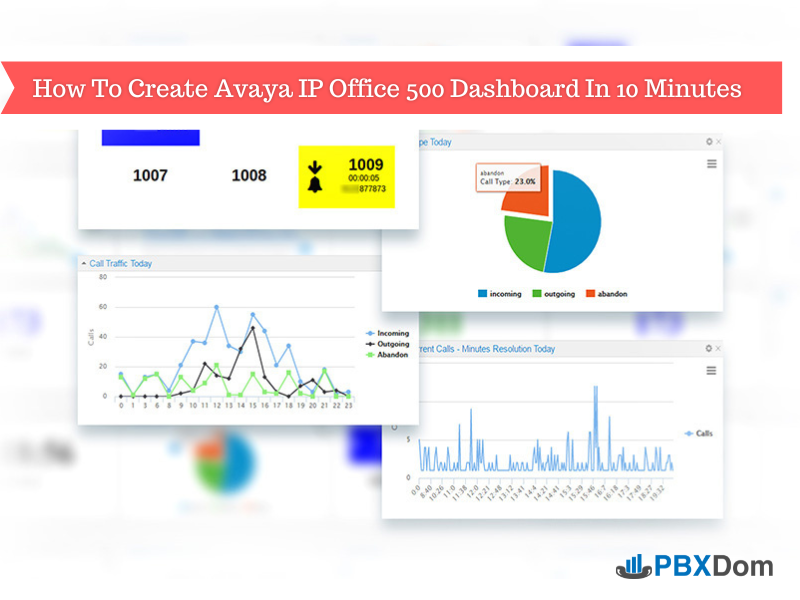
In this article, I will show you how you can create the Avaya IP Office Dashboard within only 10 Minutes. So, let’s get started and follow along with my instructions step-by-step.
Step 1:
Sign up in PBXDom at the following link:
Step 2:
After confirming your account by clicking on the link sent to your email, you will be redirected to the setup page on the PBXDom website. Before start set up the PBXDom collector software, I draw your attention to the following diagram. It shows the connection between your Avaya IP Office 500 and PBXDom.
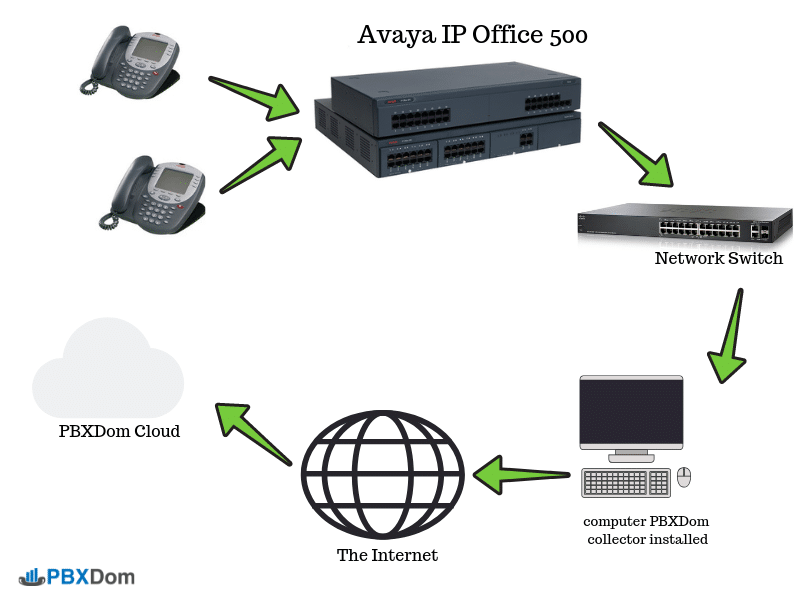
To set up your Avaya IP Office 500 Dashboard, go to the next step.
Step 3:
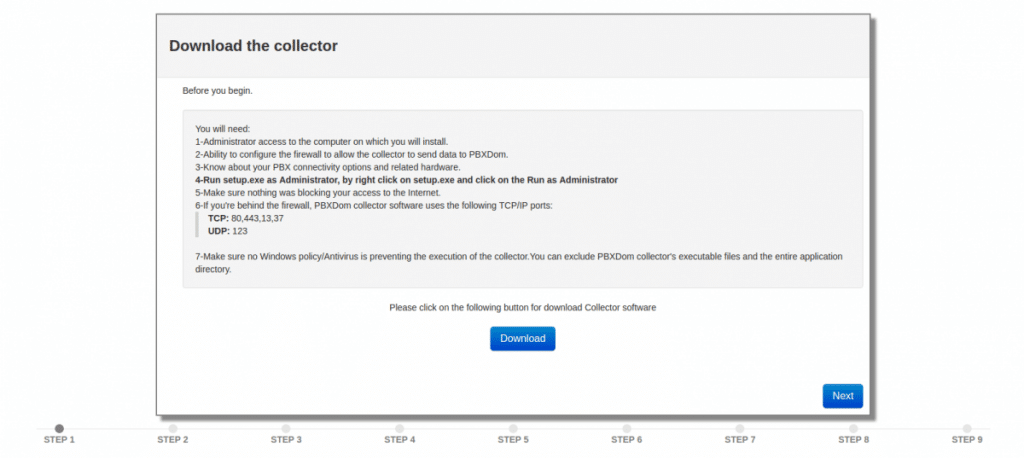
Before beginning Avaya IP Office 500 Dashboard set up, you will need:
1-Administrator access to the computer on which you will install.
2-Ability to configure the firewall to allow the collector to send data to PBXDom.
3-Know about your PBX available connectivity options and needed hardware.
4-Run setup.exe as Administrator by right-clicking on setup.exe and selecting the Run as Administrator.
5-Make sure nothing is blocking your access to the Internet.
6-If you’re behind the firewall, PBXDom collector software uses the following TCP/IP ports:
TCP: 80,443,13,37
UDP: 123
7-Make sure no Windows Policy/Antivirus is preventing the execution of the collector. You can exclude PBXDom collector’s executable files and the entire application directory.
Step 4:
Download the Collector software by click on the Download button and go to the next step.
Step 5:
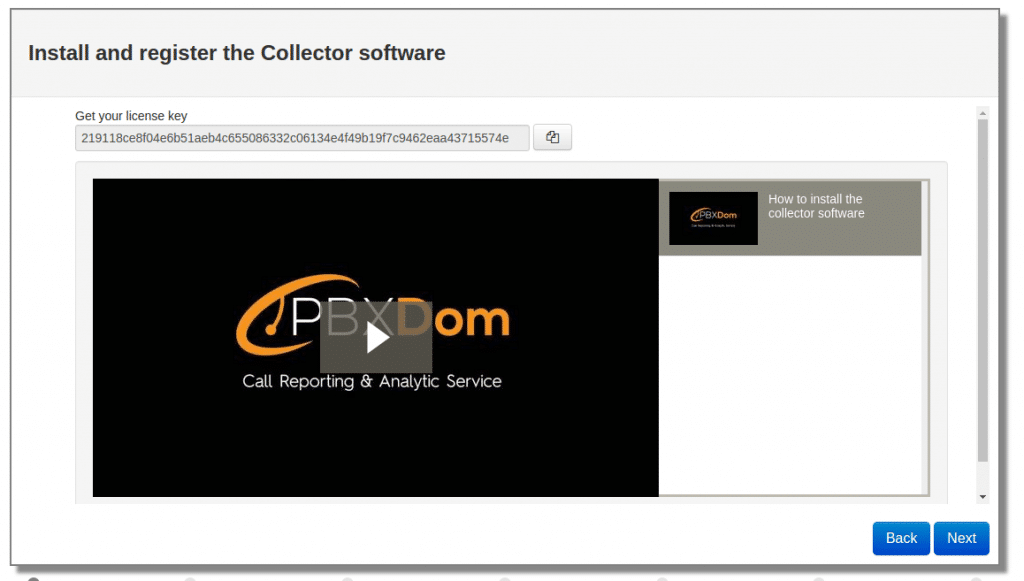
Install collector software, copy your license key, paste it into your collector, and press the register button. After your collector registered successfully, press the start button on your collector.
Please watch the following video to know how to install the collector data.
Step 6:
In the next step, you will see the following window.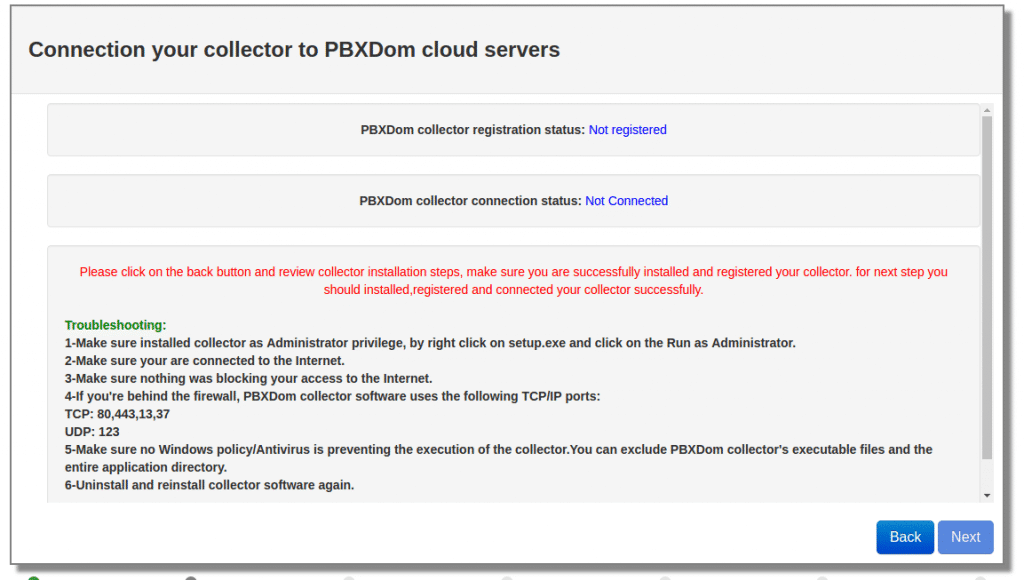
If you successfully registered your collector and started it, the PBX collector registration status changes from Not registered to Registered and collector connection status from Not connected to Connected like the following window after a few seconds.
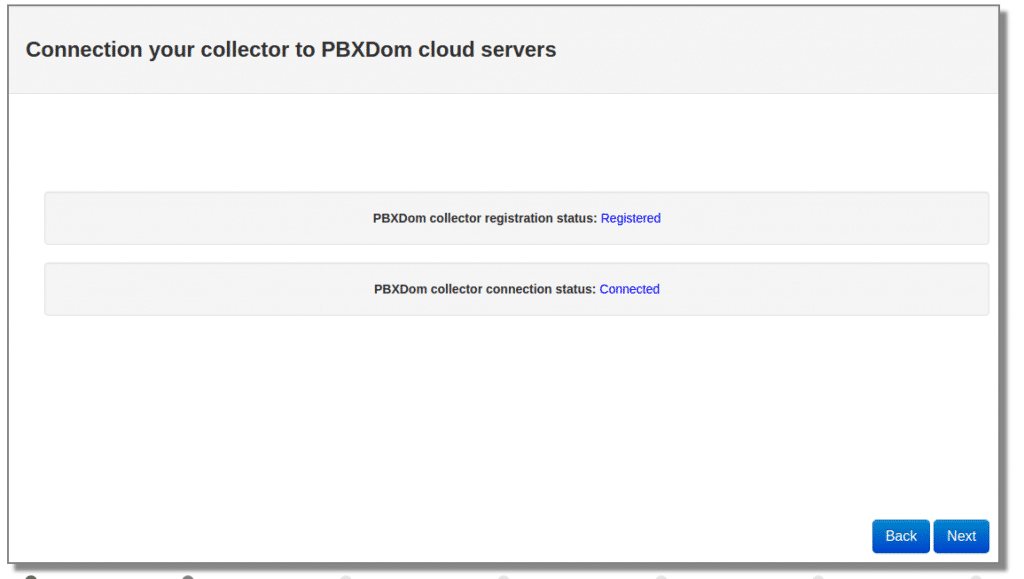
Now you can click on the Next button.
Step 7:
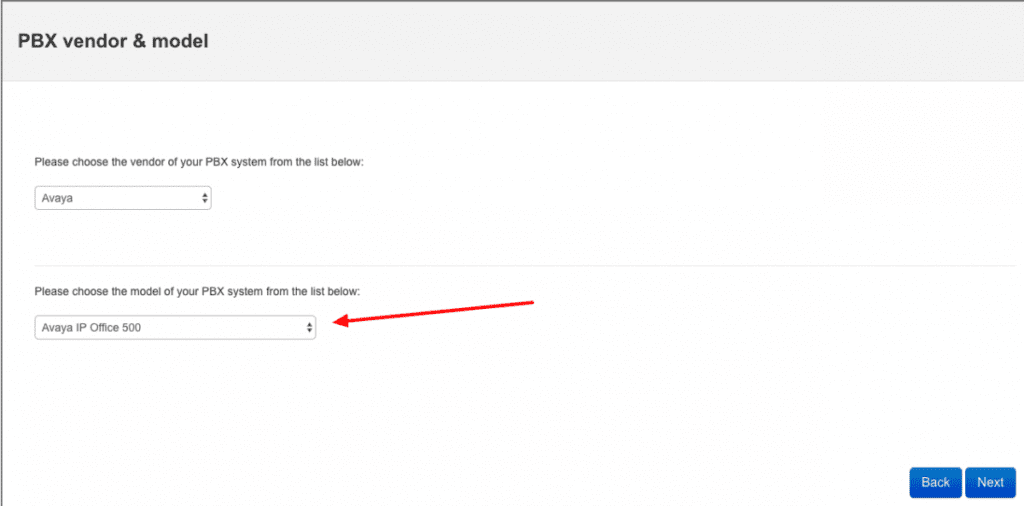
Select Avaya from the vendor list.
Select Avaya IP Office matched with your system from the model list and clicked on the Next button.
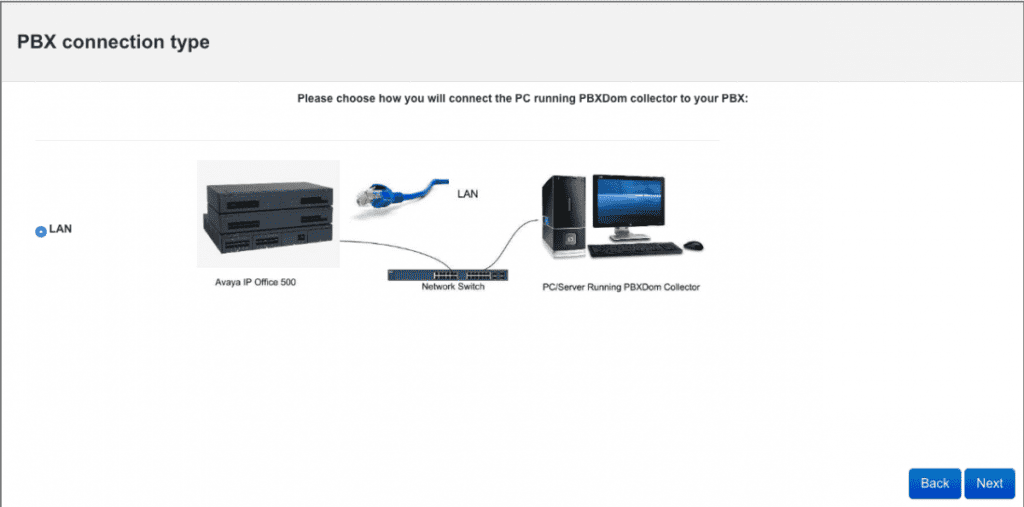
Step 8:
Click on the LAN connection and click on the Next button.
Step 9:
Select only your time zone and leave other settings as set by default.
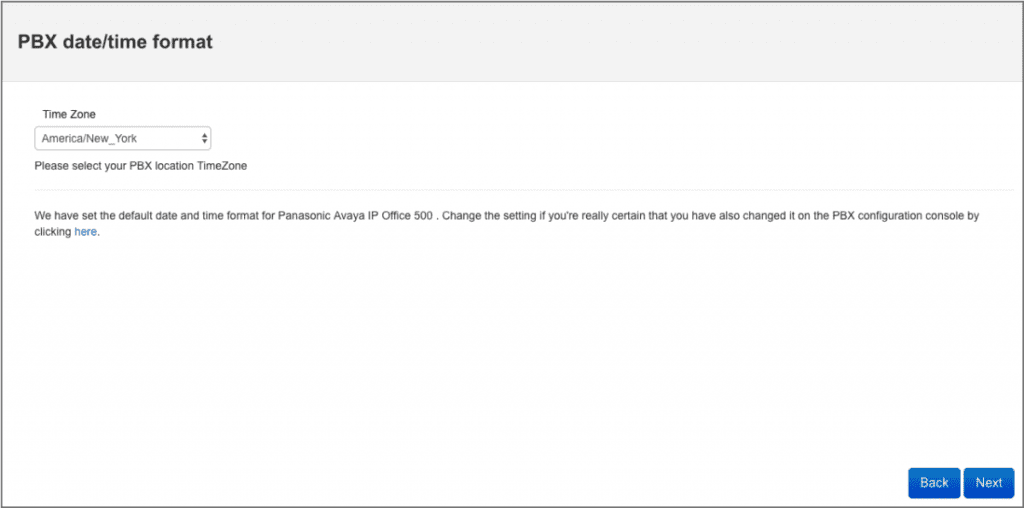
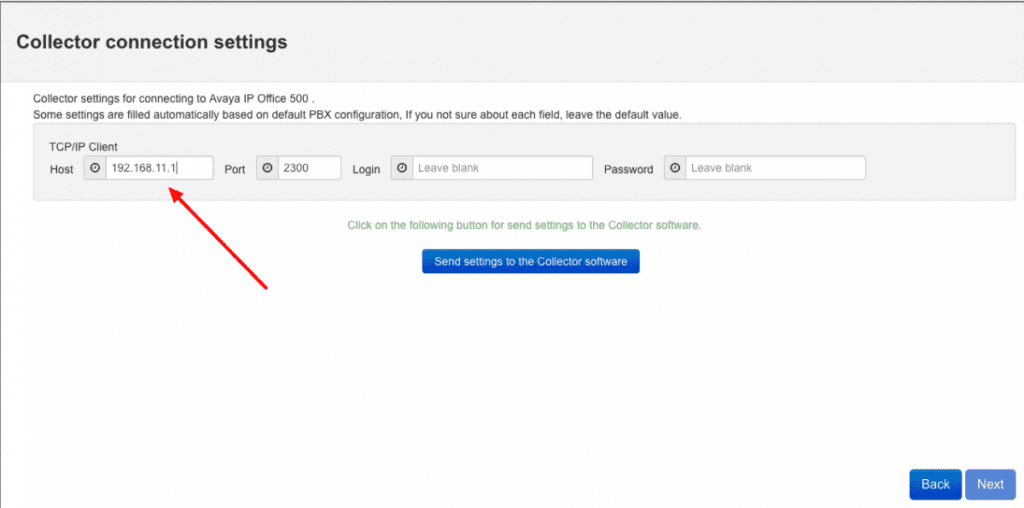
Step 10:
PBXDom collector automatically connects to your IP Office device and collects the SMDR information, enters your IP Office 500 IP address, and leaves other settings as set by default. Finally, to send settings to your collector, click on the “send settings to the collector software button.”
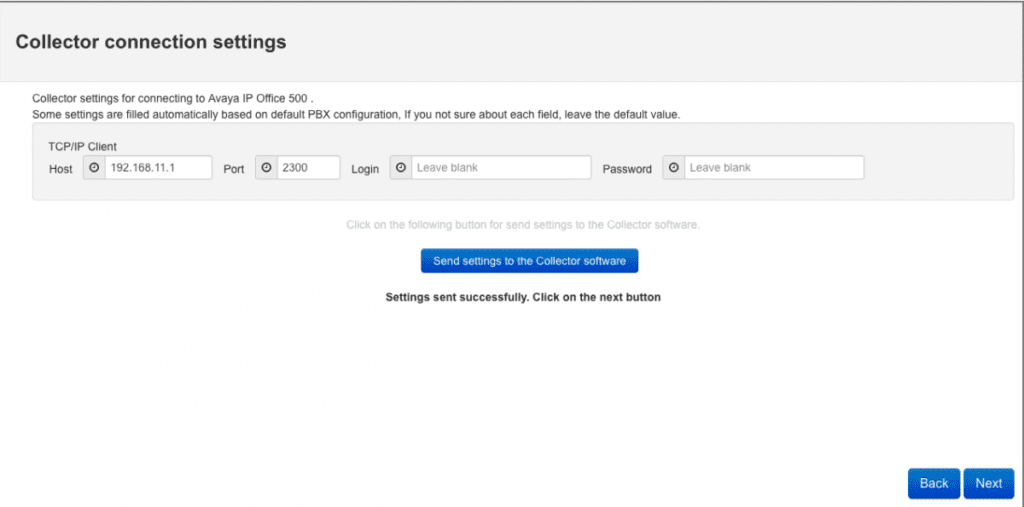
After the settings are successfully sent to your collector, you should see the following message, and you can click on the Next button.
Step 11:
In this window, you can find information about how to configure your IP Office 500.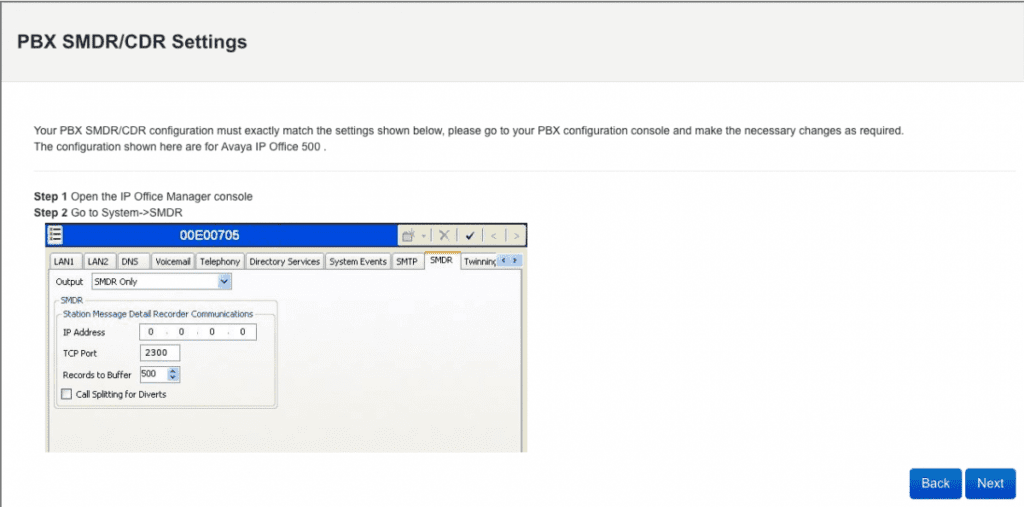
For configuring your IP Office 500 SMDR follow the instructions:
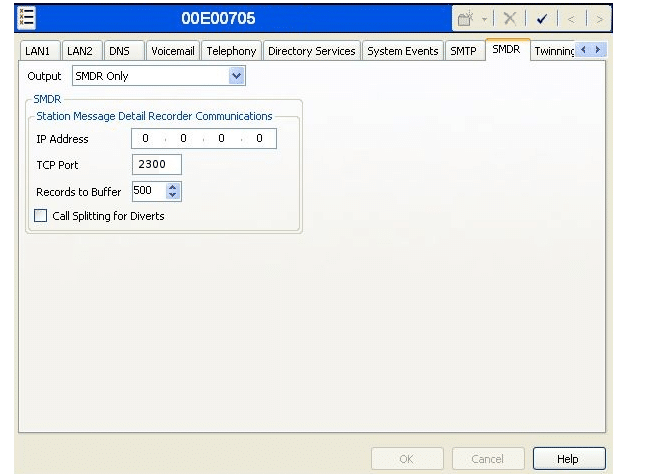
Open the IP office Manager Console or web console and go to System > SMDR and set the following values:
IP Address 0.0.0.0
TCP Port 2300
Records to Buffer 500
Call Splitting Diverts Check
Step 12:
In the next window, you should wait till all the call data get loaded to your account.
To make sure everything works, click on the “Sync settings” button on your collector.
Please don’t leave this page until you receive the OK status for all four rows below,
This should not take more than 10 minutes. If you don’t notice all the OK within this time, please review your settings.
Also, make some test calls with your PBX to include a few incoming, outgoing.
If the issue is still unresolved, please schedule a Free remote installation service by clicking the button.
After a few minutes, you should receive 4 OK and windows change to the following message on your screen.
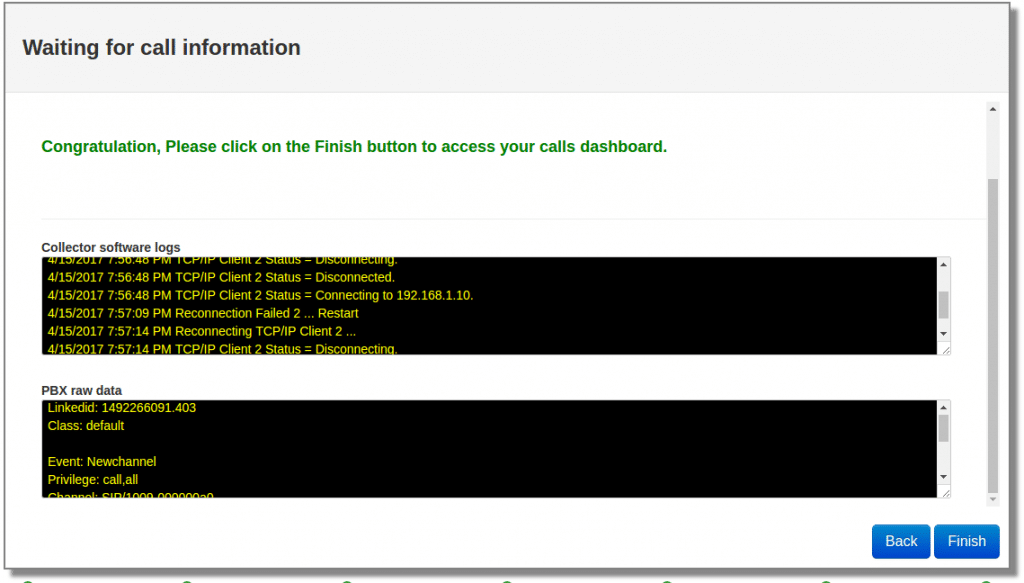
Congratulation, Please click on the Finish button to access your Avaya IP Office Dashboard.
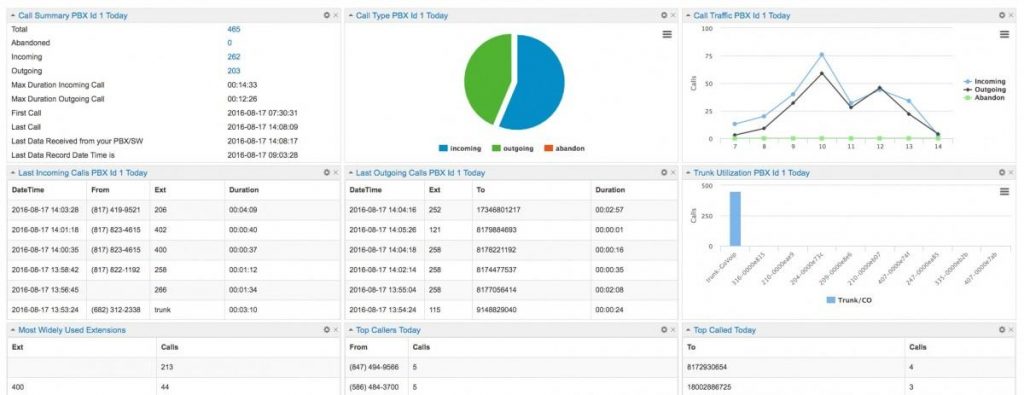
Avaya IP Office 500 Dashboard
You can make as many as 50 dashboards as you want in the PBXDom. You can add up to 12 widgets in each dashboard from more than 70 available widgets.
You can find more information about the dashboard and widget on the following page:
Also, you can share a read-only dashboard all across your entire organization.
Finally, you can find a complete set of reports, charts in the reports and chart section.
I hope this article helps you to find a very easy solution for making a dashboard for Avaya IP Office systems and deep insight into your voice traffic in your organization.