
Cisco Unified Communications Manager (formerly Cisco Unified CallManager) serves as the software-based, call-processing component of Cisco Unified Communications. (PBXDom is Cisco Call Manager Dashboard 3rdparty).
The Cisco Unified Communications Applications Server provides a high-availability server platform for Cisco Unified Communications Manager call processing, services, and applications.
The Cisco Unified Communications Manager system extends enterprise telephony features and functions to packet telephony network devices such as IP phones, media processing devices,
voice-over-IP (VoIP) gateways, and multimedia applications. Additional data, voice, and video services, such as unified messaging, multimedia conferencing, collaborative contact centers, and interactive
multimedia response systems, interact through Cisco Unified Communications Manager open telephony application program interface (API).
Cisco Unified Communications Manager provides signaling and calls control services to Cisco integrated Telephony applications and third-party applications. It performs the following primary functions:
• Call processing
• Signaling and device control
• Dial plan administration
• Phone feature administration
• Directory services
• Operations, administration, management, and provisioning (OAM&P)
• Programming interface to external voice-processing applications such as Cisco IP Communicator,
Cisco Unified IP Interactive Voice Response (IP IVR), and Cisco Unified Communications Manager
Attendant Console
For more info about Cisco CallManager, visit the following page:
https://www.cisco.com/c/en/us/products/unified-communications/unified-communications-manager-callmanager/index.html
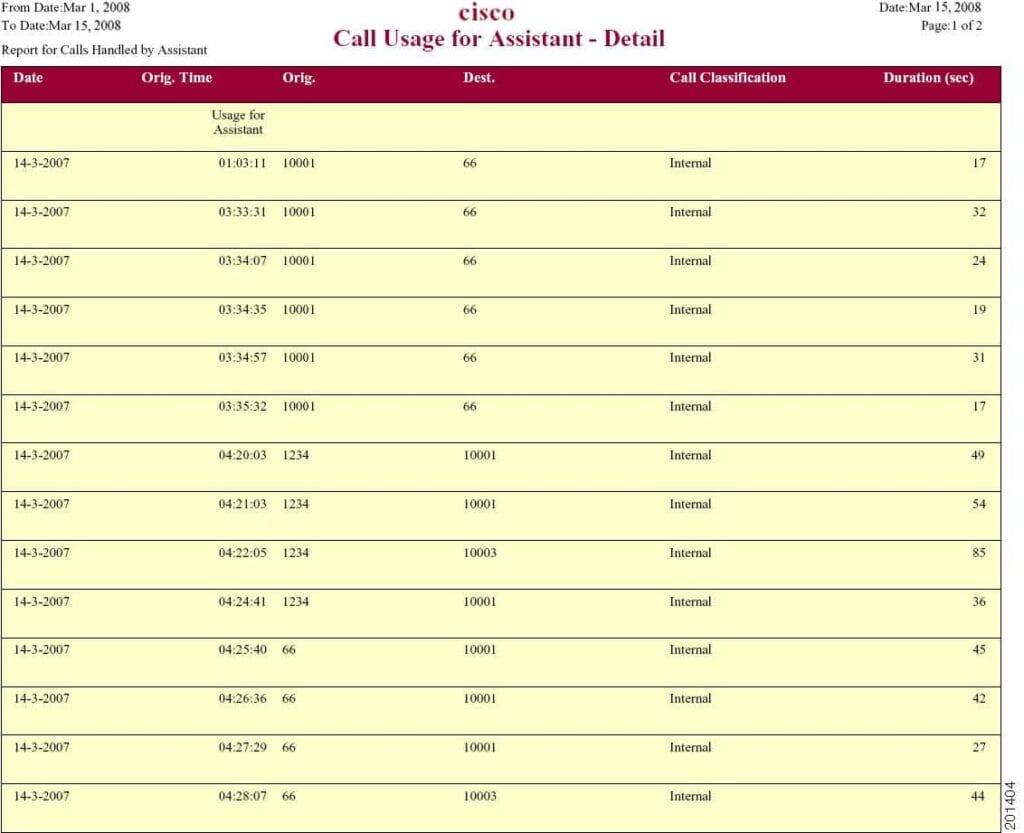
And for Cisco CDR Reporting
Cisco CDR Reporting? It’s Easy If You Do It Smart
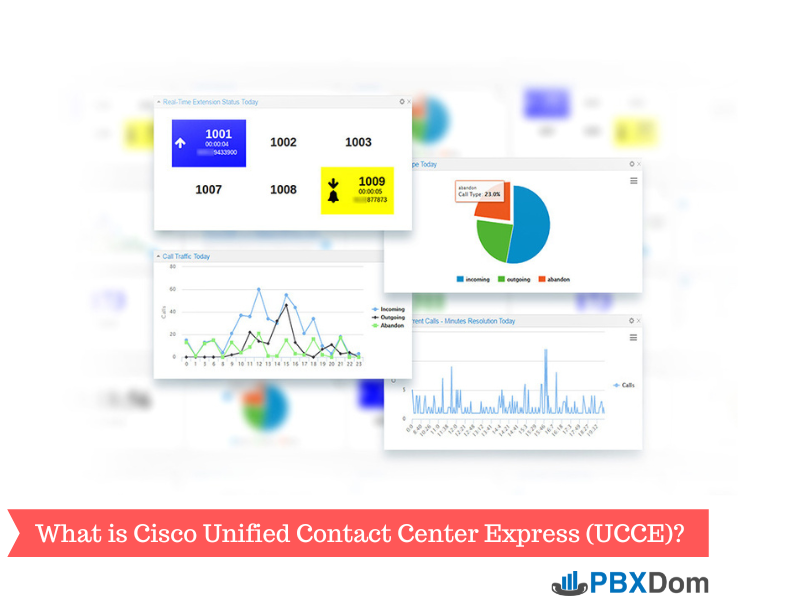
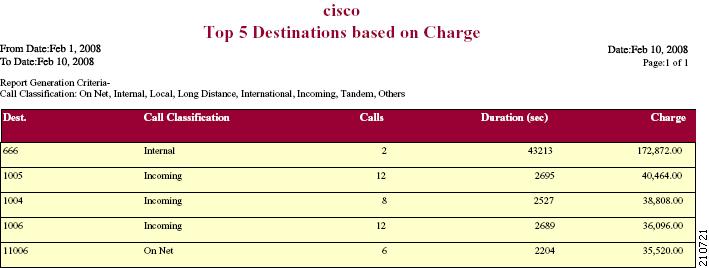
CUCM enables you to generate and have reports like this:
You can access all reports by Cisco Unified CDR Analysis and Reporting service.
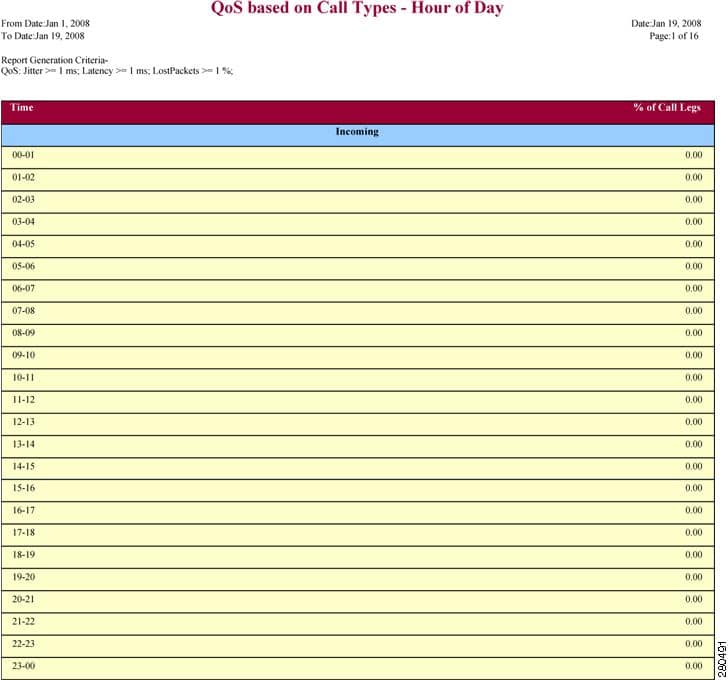
Or Call Types report hourly
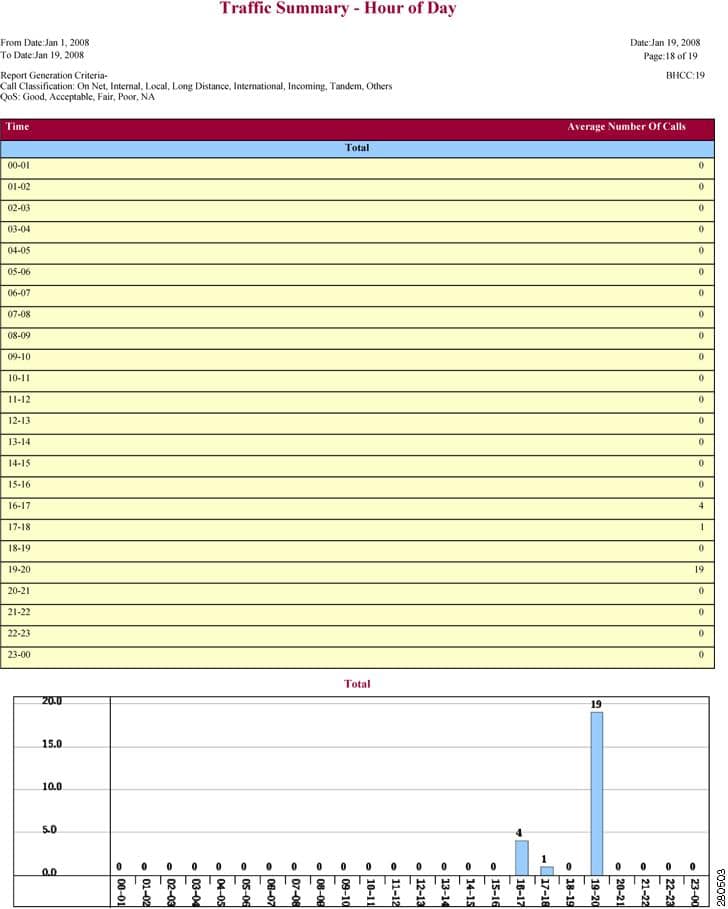
And Traffic Summary
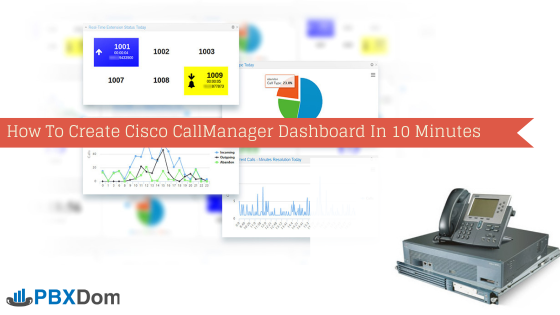
In this article, I will show you how you can create Cisco CallManager Dashboard within only 10 Minutes. So, let’s get started and follow along with my instructions step-by-step.
Step 1:
Sign up in PBXDom at the following link:
https://www.pbxdom.com/pricing/
Step 2:
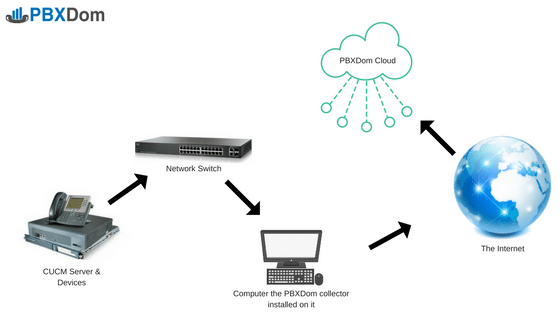
After confirming your account by clicking on the link sent to your email, you will be redirected to the setup page on the PBXDom website. Before start set up the PBXDom collector software, I draw your attention to the following diagram. It shows the connection between your CUCM and PBXDom.
To set up your Cisco CallManager Dashboard, go to the next step.
Step 3:
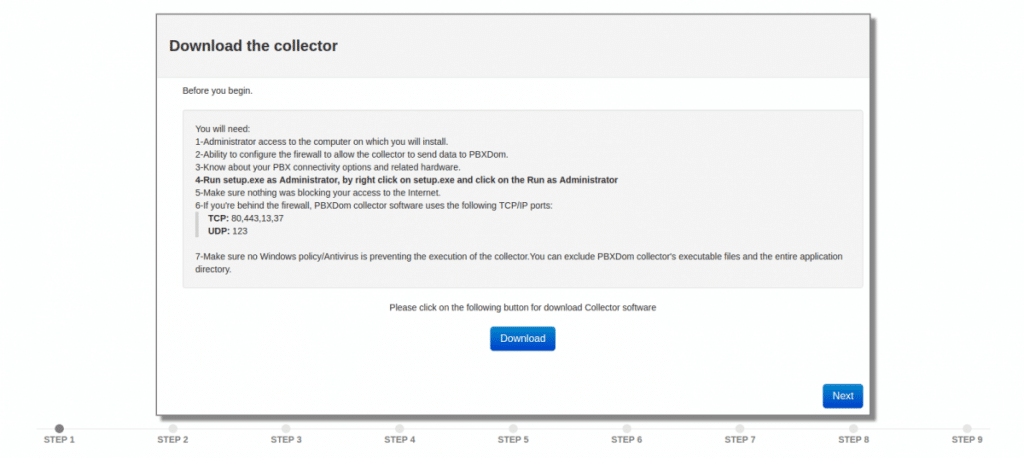
Before beginning Cisco CallManager Dashboard set up, you will need:
1-Administrator access to the computer on which you will install.
2-Ability to configure the firewall to allow the collector to send data to PBXDom.
3-Know about your PBX available connectivity options and needed hardware.
4-Run setup.exe as Administrator by right-clicking on setup.exe and selecting the Run as Administrator.
5-Make sure nothing is blocking your access to the Internet.
6-If you’re behind the firewall, PBXDom collector software uses the following TCP/IP ports:
TCP: 80,443,13,37
UDP: 123
7-Make sure no Windows Policy/Antivirus is preventing the execution of the collector.You can exclude PBXDom collector’s executable files and the entire application directory.
Step 4:
Download the Collector software by click on the Download button and go to the next step.
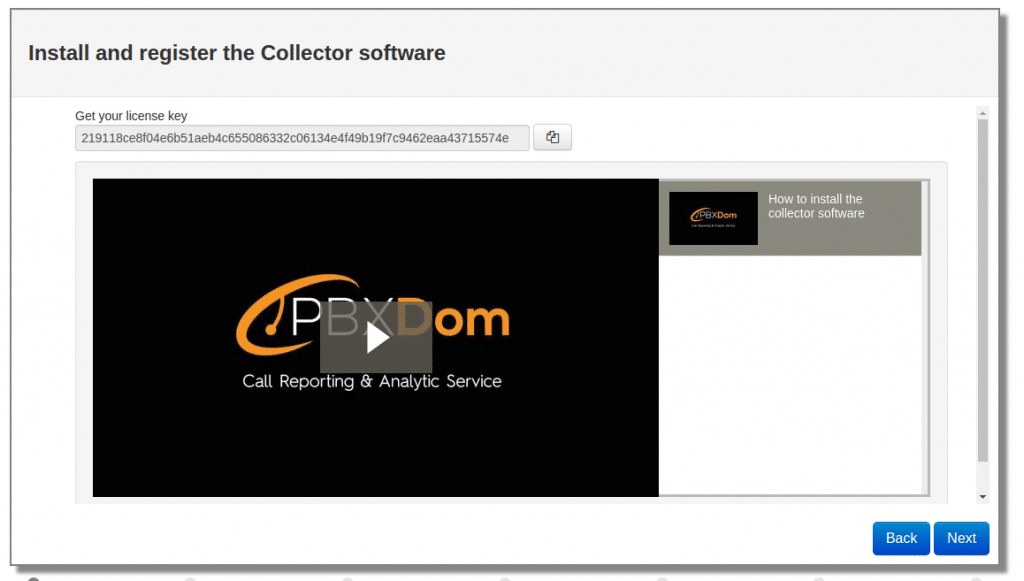
Step 5:
Install collector software, copy your license key, paste it into your collector, and press the register button. After your collector registered successfully, press the start button on your collector.
Please watch the following video to know how to install the collector data.
In the next step, you will see the following window.
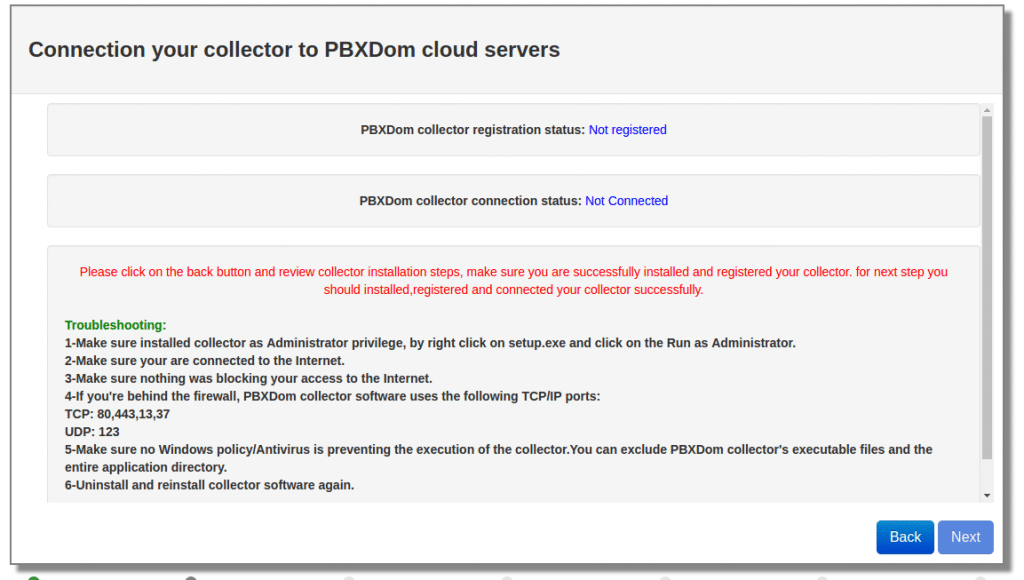
If you successfully registered your collector and started it, the PBX collector registration status changes from Not registered to Registered and collector connection status from Not connected to Connected like the following window after a few seconds.
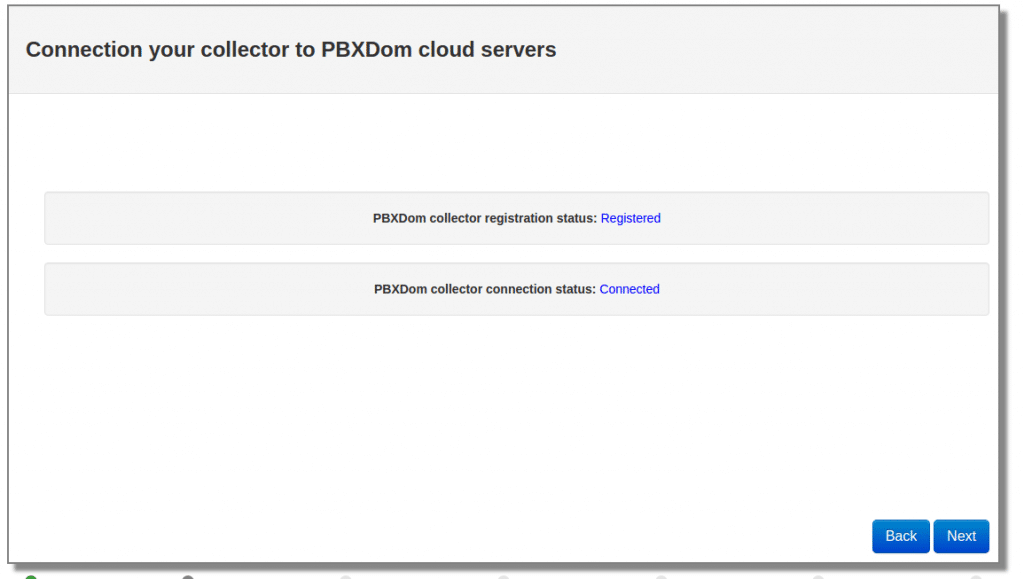
Now you can click on the Next button.
Step 7:
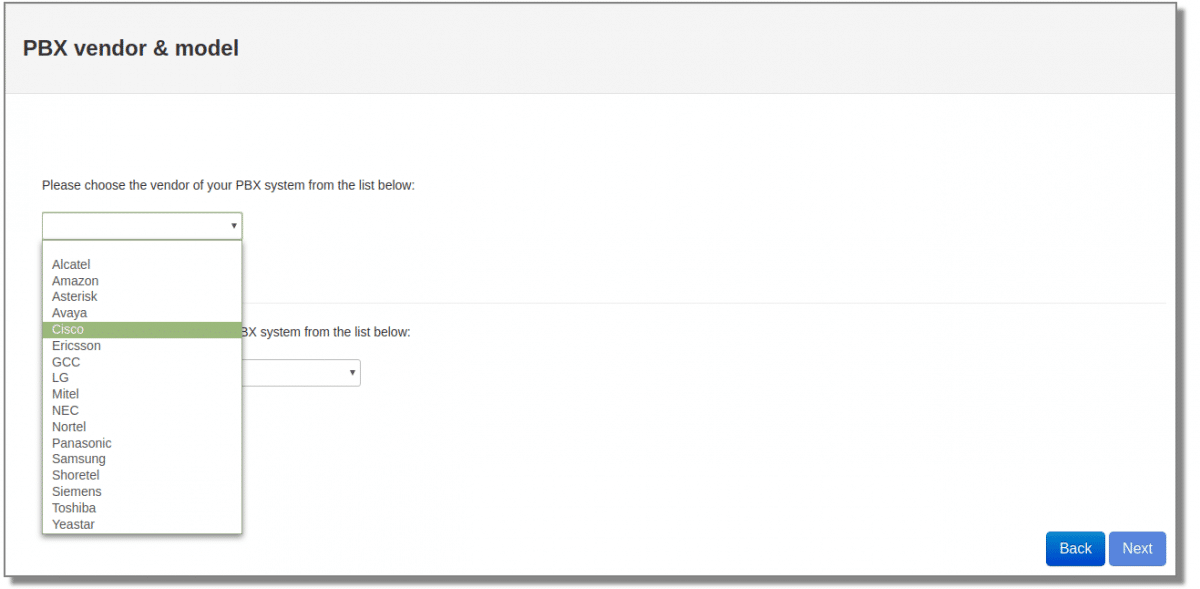
Select Cisco from the vendor list.
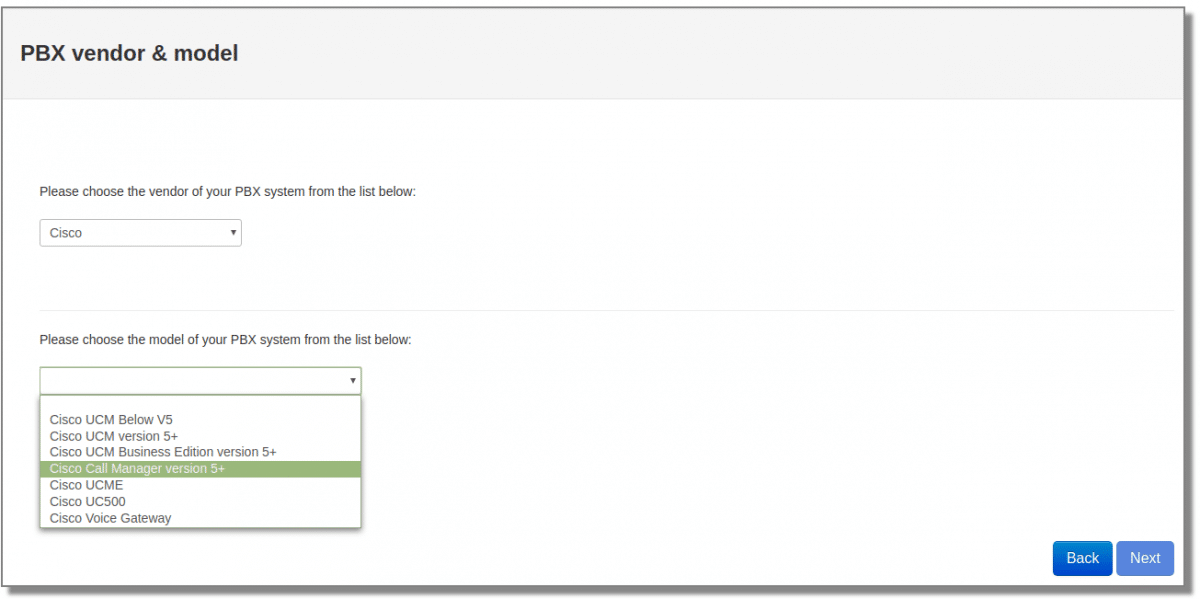
Select Cisco Call Manager version 5+ from the model list and click on the Next button.
Step 8:
Click on LAN connection and click on the Next button.
Step 9:
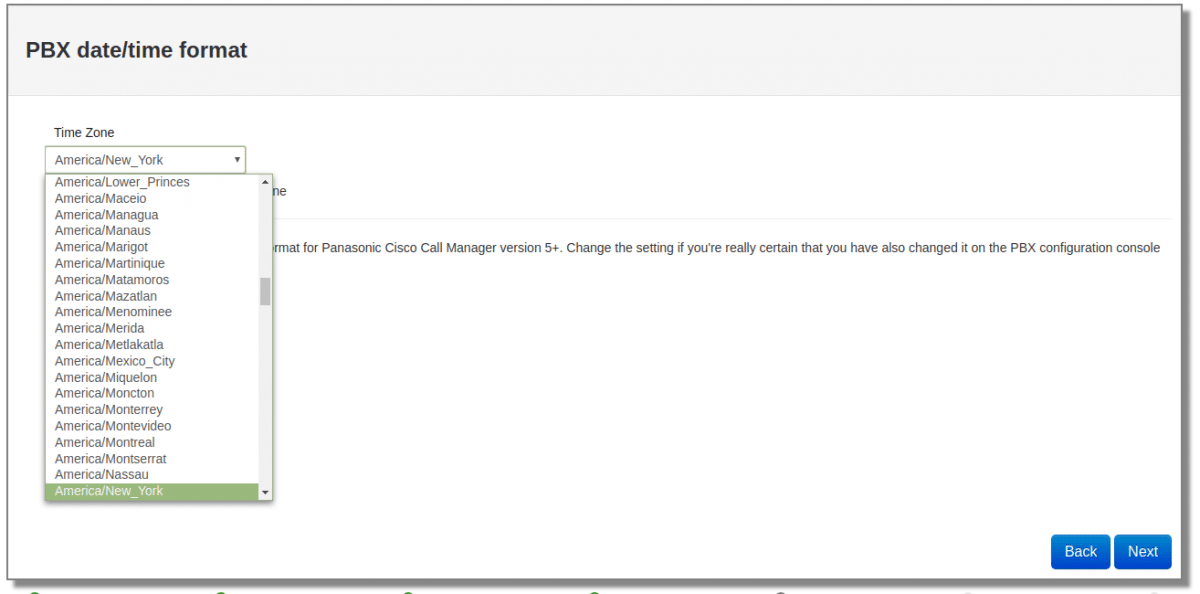
Select only your time zone and leave other settings as set by default.
Step 10:
PBXDom collector has an internal FTP server; if you already have an FTP server on the current machine you installed the collector software on it, please stop them or change the FTP server port settings in the following fields and leave other settings as set by default. Finally, to send settings to your collector, click on the “send settings to the collector software button.”
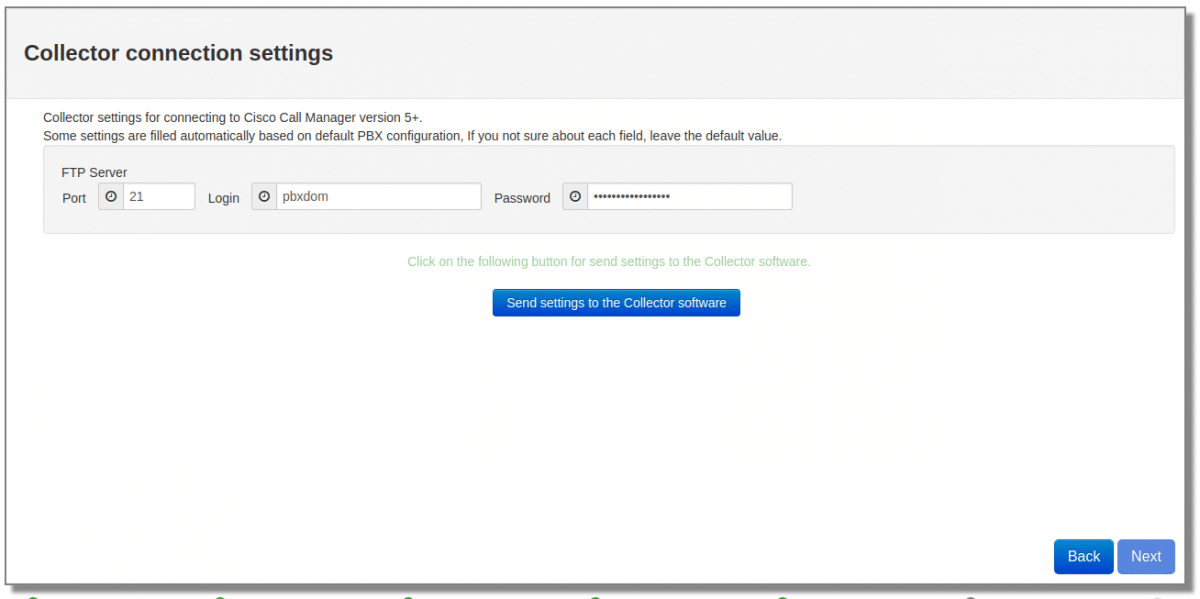
The default user is pbxdom, and the default password is pbxdom@localhost
Note: leave the default user and password
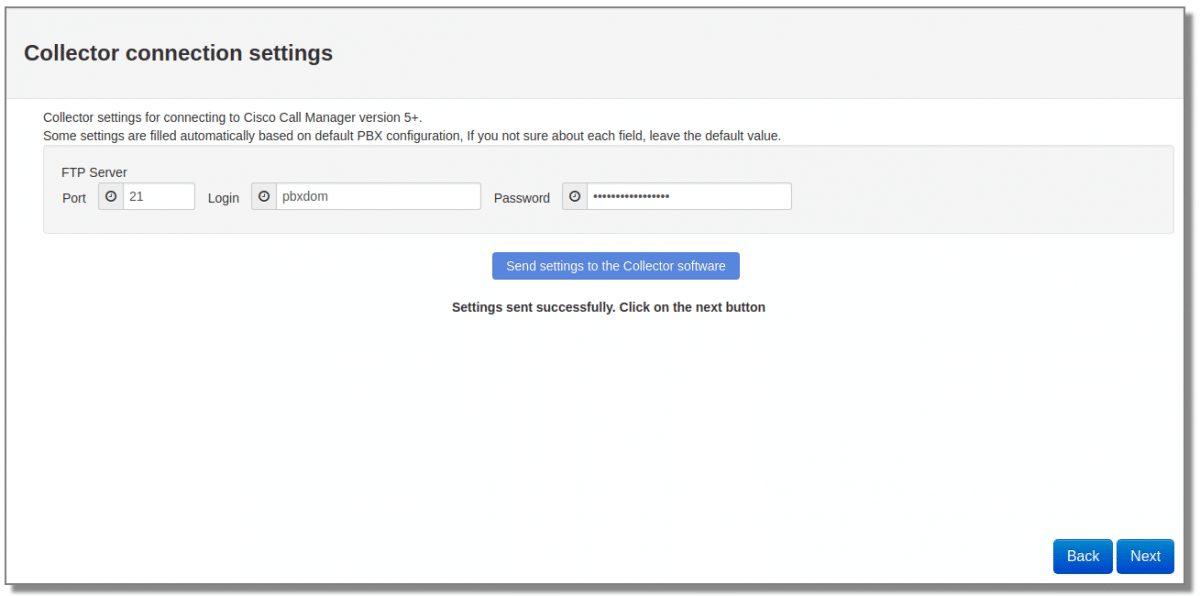
After the settings are successfully sent to your collector, you should see the following message, and you can click on the Next button.
Step 11:
On Windows, you can find information about how to configure your CUCM(Cisco CallManager) server to send CDR files to the collector server.

For configuring your CUCM, to send CDR files to the collector software, follow the instructions:
Set up FTP/SFTP in Cisco UCM
You will need to configure your Cisco UCM to send the CDR data to the PBXDom collector.
1- Log in to Cisco UCM Administration and from the left-hand menu, click on the System tab and select Service Parameters.
2- Choose your UCM node from the Server drop-down list.
3- Select Cisco Call Manager from the Service drop-down list.
4- In the System section, change the CDR Enabled Flag to True. Enable this parameter on all servers within the cluster you want to log calls for.

5- Change the CDR Log Calls with Zero Duration Flag to True. This parameter enables or disables the logging of CDRs for calls that did not connect.
6- Click on the Save button.
7- From the System menu, select Enterprise Parameters
8- Change the CDR File Time Interval to 1.
9- Click on the Save button.
10- Click on the Navigation drop-down list from the top right-hand corner, and select Cisco Unified Serviceability. You may need to log in to a user account that has administrative permissions.
11- Select Tools, then click on the CDR Management tab.
12- Click the Add New button. You will now see the Billing Application Server Parameters window. Enter the following parameters:
—————————————
Host Name / IP Address: The IP address or hostname of the machine running PBXDom collector.
User Name: pbxdom
Password: pbxdom@localhost
Protocol: Select FTP
Directory Path: Enter /
Check tick Resend on Failure.
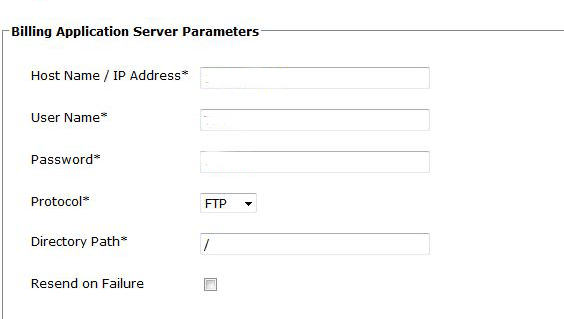
13- Next, click on the Add button to complete the billing server configuration. The UCM node will check that the FTP/SFTP details are valid and will write a test file to the FTP/SFTP directory. If this fails, you should double-check the details you entered.
Step 12
In the next window, you should wait till all the call data get loaded to your account.
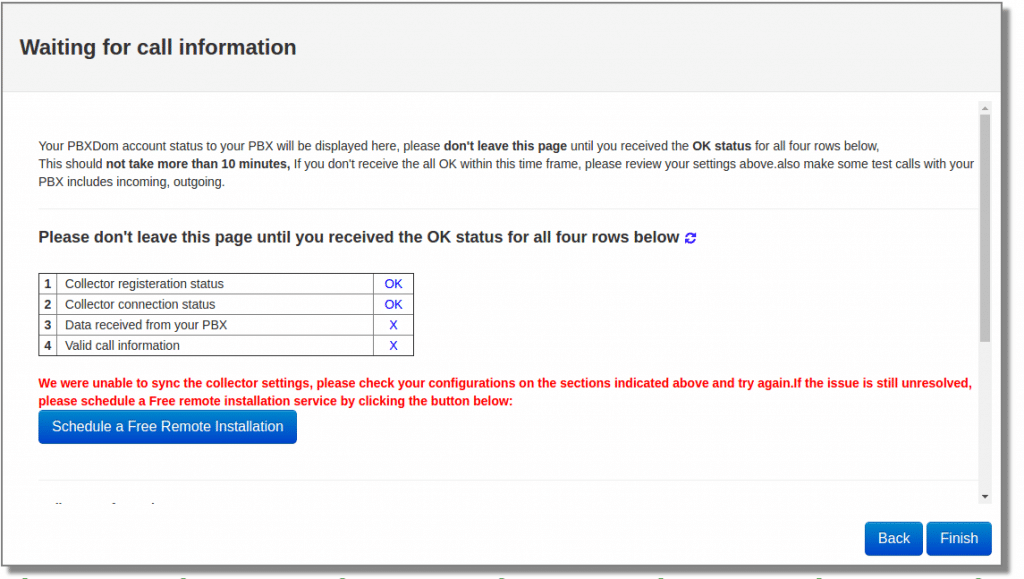
Please don’t leave this page until you receive the OK status for all four rows below,
This should not take more than 10 minutes. If you don’t notice all the OK within this time, please review your settings.
Also, make some test calls with your PBX to include a few incoming, outgoing.
If the issue is still unresolved, please schedule a Free remote installation service by clicking the button.
After a few minutes, you should receive 4 OK and windows change to the following message on your screen
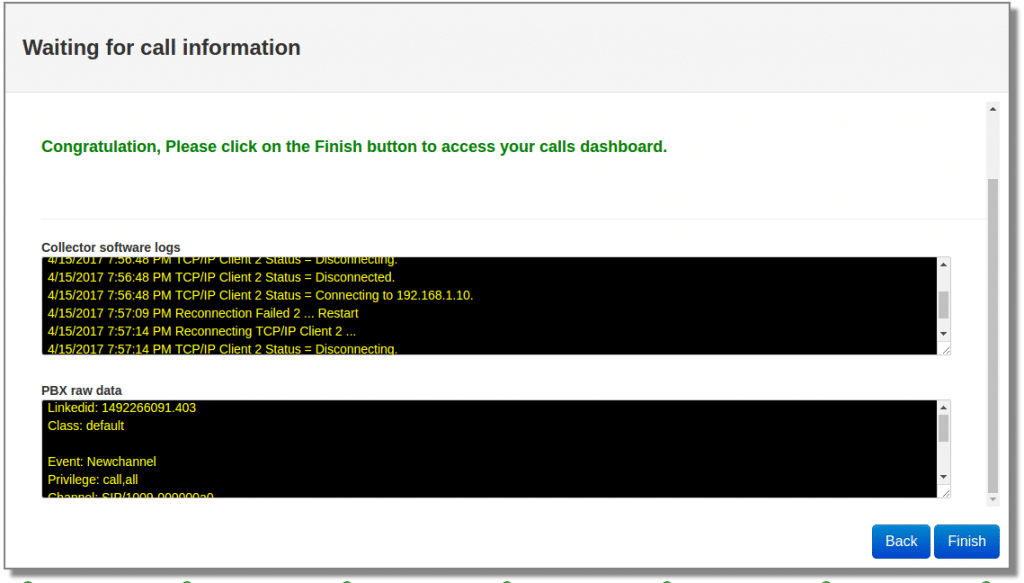
Congratulation, Please click on the Finish button to access your Cisco CallManager Dashboard.
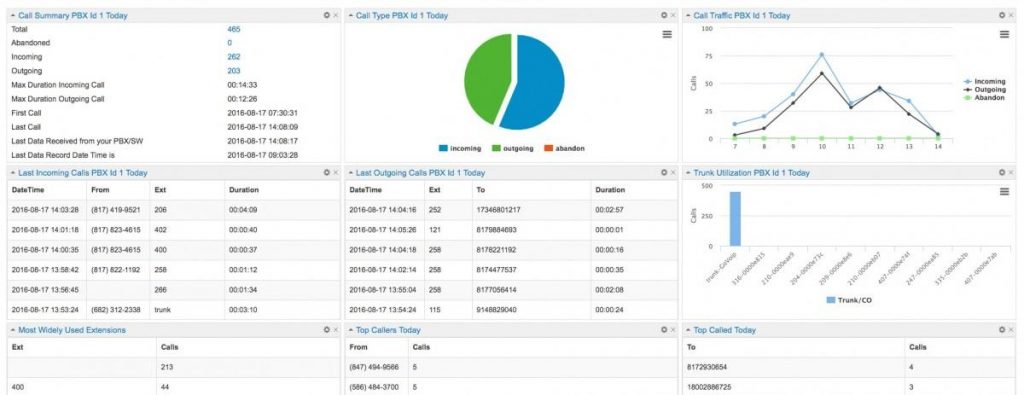
Cisco CallManager Dashboard
You can make as many as 50 dashboards as you want in the PBXDom. You can add up to 12 widgets in each dashboard from more than 60 available widgets.
You can find more information about the dashboard and widget on the following page:
Also, you can share a read-only dashboard all across your entire organization.
Finally, you can find a complete set of reports, charts in the reports and chart section.
I hope this article helps you find a straightforward solution for making a dashboard for CUCM systems and deep insight into your voice traffic in your organization.