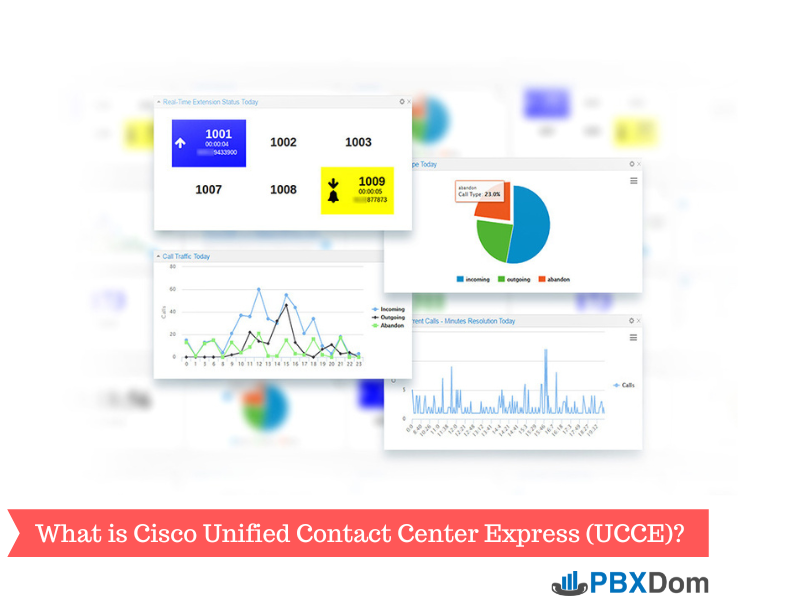

Many organizations use the Cisco Call Manager as their primary communication platform. Cisco Call Manager is one of the most well-known platforms with many features and capabilities. Developers looking to use the Cisco Call Manager call information in their applications such as CRM, billing, or helpdesk should spend a lot of time learning to understand the Cisco system and how they can deal with that information directly from the Cisco Call Manager.
Today, I want to show you how you can save your Cisco Call Manager data to a Mysql table with the Node.js script. I use the PBXDom API, powerful call analytics and reporting tool, to achieve that goal. So, if you are interested, let’s go.
Step 1.
First, you should sign up for a PBXDom account. Fortunately, you can try 14 days for free; then, you should install the collector software and connect it to your CUCM. All of them take about 10 minutes of your time. I suggest reading the following article about connecting your Cisco Call Manager to PBXDom, accessing the dashboard and reports, and connecting to API.
https://www.pbxdom.com/how-to-create-cisco-callmanager-dashboard-in-10-minutes
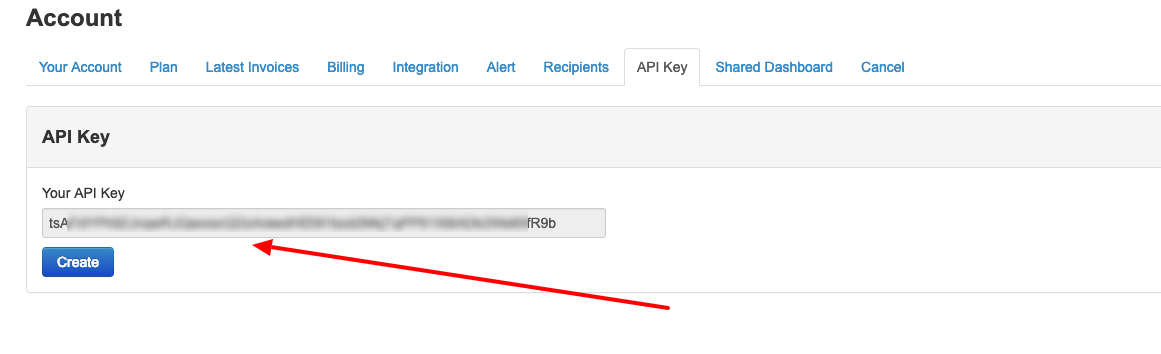
Step 2.
After logging in to your PBXDom account, go to Settings –> account and get your API key.
Step 3.
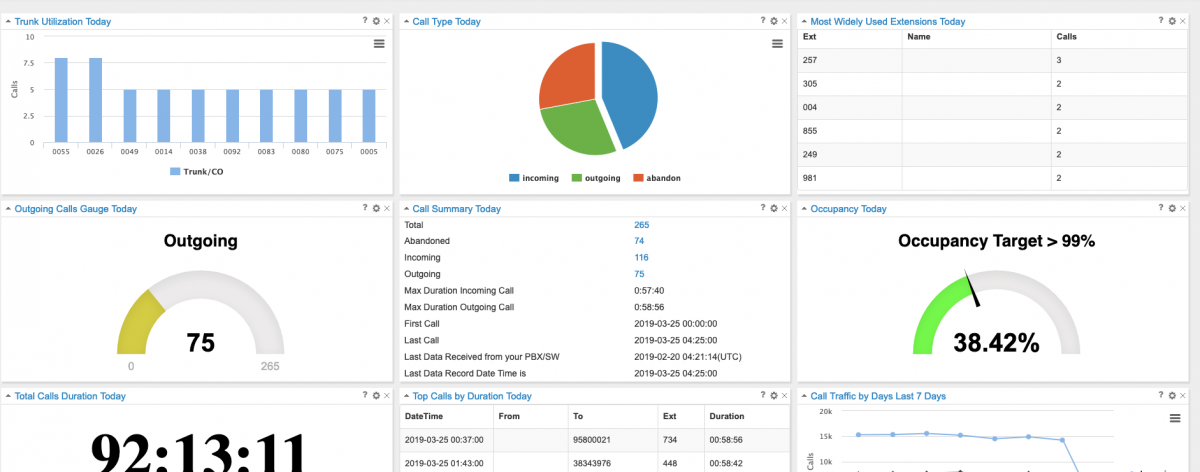
Before going to the next step, make sure your CUCM is connected to PBXDom, and you can see your call information in the dashboard.
Step 4.
PBXDom offers RESTful API, meaning we can connect and use it with any programming language, but today I want to use one of the most and popular back-end programming languages, Node.js.
My goal is to connect to PBXDom API, get all the call information, and then insert it into a MySQL table. Also, that script should be able to run continuously and fetch new data automatically, so we are always expected to have the latest info in our MySQL table. If you want to use the call information for another purpose, you can change the scenario to fit your needs instead of inserting the data into MySQL.
Step 5.
In the first step, we need to know about the endpoints available and API documentation. You can find all of them at the following address:
https://www.pbxdom.com/api-documentation
The endpoint addresses are:
https://api.pbxdom.com to https://api10.pbxdom.com so we can use any of them, but I chose the first: api.pbxdom.com.
We need to call the /Calls resource to get call information. Let’s look at the Calls resource parameters
https://api.pbxdom.com/Calls?access_token=" + APIKey +
"&fromDate=" + StartDate + "&limit=" + limit +
"&q=&reporttype=3&rptId=3&rptType=1&sortBy=callDateTime&sortType=asc&sortcoldef=0&start=" + Start +
"&toDate=" + EndDate
Access_token = Your API key
fromDate = Start date to get call info
Limit = limit the result (it can be up to 10,000)
Start = start offset (I use it to get new data each time we run the script)
toDate = End date to get call info
We don’t need all the other parameters, but you can find more info about them on the API documentation page if you’d like to play with them.
So, our GET request will be something like this:
https://api.pbxdom.com/Calls?access_token=YOUR_API_KEY&fromDate=2019-3-10+00:00:00&limit=50&q=&reporttype=3&rptId=3&rptType=1&sortBy=callDateTime&sortType=asc&sortcoldef=0&start=0&toDate=2019-3-10+23:59:59
The response is like this:
{
"meta": {
"count": 50,
"totalCount": 1
},
"calls": [
{
"id": 2393677,
"callDateTime": "2019-03-10 00:50:00",
"ring": "00:00:00",
"callDirection": 1,
"callTypeMapId": 0,
"dialedPhone": "21633711",
"callerPhone": "365",
"callerName": "",
"ext": "365",
"extName": null,
"duration": "00:19:42",
"cost": 0,
"spamStatus": 0,
"co": "0051",
"coName": null
}
]
}
It has two parts: meta and calls. We use both of them in our script. At first, to make sure your API is working correctly, you can get data from API by Curl command like this:
curl 'https://api9.pbxdom.com/Calls?access_token=YOUR_API_KEY&fromDate=2019-3-10+00:00:00&limit=50&q=&reporttype=3&rptId=3&rptType=1&sortBy=callDateTime&sortType=asc&sortcoldef=0&start=0&toDate=2019-3-10+23:59:59' -H 'Accept: application/json, text/plain, */*'
If you get the same result as before, go ahead to the next step.
Step 6.
If I want to use the request package for Nodejs to make a GET request to an API endpoint, it’s straightforward. For more info, you can visit their page at
https://github.com/request/request
To install the request package, write the following command:
npm install request
Var URL=”https://api.pbxdom.com/Calls?access_token=YOUR_API_KEY&fromDate=2019-3-10+00:00:00&limit=50&q=&reporttype=3&rptId=3&rptType=1&sortBy=callDateTime&sortType=asc&sortcoldef=0&start=0&toDate=2019-3-10+23:59:59”
request.get(URL, { timeout: 60000 }, function(err, resp) {
console.log(resp)
});
Save that code into the index.js file and run it by:
Node index.js
You should see the same result as the curl command in your console.
Until now, we were getting data from API, but we should be getting all data. We should get the new data and always be updated, so with a start and limit parameters; we can achieve our goal.
They are like a MySQL limit command:
Select * from table limit 0,10
This means select from the table from record 0 up to 10 records
And if we want the next 10 records, we write another SQL like this:
Select * from table limit 10,10
It means select from the table from record 10 up to 10 records
We can do the same things with PBXDom API start and limit parameters. We should care that we need to write a script that should be run every minute or every 5 minutes, depending on your requirement and application. Our script should be run several times a day. On the other hand, we can’t fetch more than 10,000 records each time, as I mentioned before. Also, we should care about the MySQL database load and the performance of our application so that we can choose 50 or 100 or any small number like that; each time we run our script, we only receive the 50 records, and then we save the offset into a JSON file because we need to know for the next time we want to run the script which offset to start from and get new data after that.
For saving and retrieving data to a JSON file, I wrote the following functions. We will use them in our script for saving and retrieving the current offset.
var SavetoConfig = function(Data, cb) {
var obj = {
table: []
};
obj.table.push(Data);
var json = JSON.stringify(obj);

fs.writeFile('config.json', json, function(res) {
console.log('Done')
cb()
});
}

var ReadConfig = function(cb) {
fs.readFile('config.json', 'utf8', function readFileCallback(err, data) {
if (err) {
cb({
table: [{ offset: 0 }]
})
} else {
obj = JSON.parse(data);
cb(obj)
}
});
}
Thanks, https://stackoverflow.com/a/36856787/6619626
SavetoConfig function gets the JSON object and saves it to a JSON file named config.json
ReadConfig function retrieves config.json file data as a JSON object to you
For example, we can use SavetoConfig like this:
SavetoConfig({ offset: 100}, function(res) {

})
It will save the offset variable with the value 100 in our JSON file.
To retrieve that data, we will call ReadConfig like this:
ReadConfig(function(res) {
Var offset=res.table[0].offset
})
Now, the offset variable has our offset value from the config.json file.
Step 7:
Now we should assemble all parts together for getting all call data from your account. Our code now looks like this:
const request = require('request')
const fs = require('fs');

var SavetoConfig = function(Data, cb) {
var obj = {
table: []
};
obj.table.push(Data);
var json = JSON.stringify(obj);

fs.writeFile('config.json', json, function(res) {
console.log('Done')
cb()
});
}

var ReadConfig = function(cb) {
fs.readFile('config.json', 'utf8', function readFileCallback(err, data) {
if (err) {
cb({
table: [{ offset: 0 }]
})
} else {
obj = JSON.parse(data);
cb(obj)
}
});
}

ReadConfig(function(res) {

var StartDate = "2019-3-21+00:00:00"
var EndDate = "2019-3-21+23:59:59"
var APIKey = "YOUR_API_KEY"
var Start = res.table[0].offset
var limit = 50
var URL = "https://api.pbxdom.com/Calls?access_token=" + APIKey + "&fromDate=" + StartDate + "&limit=" + limit + "&q=&reporttype=3&rptId=3&rptType=1&sortBy=callDateTime&sortType=asc&sortcoldef=0&start=" + Start + "&toDate=" + EndDate;
console.log(URL)
request.get(URL, { timeout: 60000 }, function(err, resp) {
if (JSON.parse(resp.body).calls.length > 0) {
var TotalRecords = JSON.parse(resp.body).meta.totalCount;
var LastArrId = JSON.parse(resp.body).calls.length - 1
var LastRecNo = JSON.parse(resp.body).calls[LastArrId].id;
console.log('Total Records =>', TotalRecords, LastRecNo)
console.log(JSON.parse(resp.body).calls.length, " Records retrived")
if (Start + limit < TotalRecords || TotalRecords - Start < limit) {
if (TotalRecords - Start < limit) {
Start = TotalRecords
limit = 0
}
SavetoConfig({ offset: Start + limit }, function(res) {

})

}

} else {
console.log("No new records")
}

});
})
For clarity, I use different variables for each of the parameters to change them quickly. Also, you should care about the StartDate and EndDate variables and enter the right values. I set the limit to 50, but you can change it to any other number; the max number is 10,000.
If you save the last part into your index.js and run it the first time, it will try to get config.json file data. Because it can’t find it, it returns 0 objects, so our script reads data from 0 records. But when we call the API and get the result, we then save the new offset to config.json for the next call.
When we run the script for the second time, it reads config.js again, gets the offset value, and passes it to API, and we will get the next chunk of data.
That is all the logic of the script.
Step 8.
Until now, we wrote a script, and it could get all the data and print it into the console. We can quickly put it to Cron job or Windows scheduler to run every minute. Now, we should add the Mysql part for inserting the retrieved data to a MySQL table.
I use the Mysql package in Nodejs. To install the MySQL package, run the following command:
Npm install MySQL
var connection = mysql.createConnection({
host: 'YOUR_MYSQL_SERVER_IP',
user: 'root',
multipleStatements: true,
password: '10002000',
database: CALL
});
connection.connect();
The above code connects to your MySQL. We need to create an SQL query insert and run it based on the data we received from API.
var sql = 'Insert into CallInfo (id,callDateTime,ring,callDirection,callTypeMapId,dialedPhone,callerPhone,callerName,ext,extName,duration,cost,spamStatus,co,coName) values '
var data = ''
JSON.parse(resp.body).calls.forEach(function(call) {
data = date + "(" + call.id + ",'" + call.callDateTime + "','" + call.ring + "'," + call.callDirection + "," + call.callTypeMapId + "," + call.dialedPhone + "," + call.callerPhone + "," + call.callerName + "," + call.ext + "," + call.extName + "," + call.duration + "," + call.cost + "," + call.spamStatus + "," + call.co + "," + call.coName + "), "
})
connection.query(sql + data, function(err, rows) {
console.log("Data inserted successfully to MySQL table")
});
Let’s explain the above code.
At first, set an SQL variable for the Insert command with the column information. As you see, you should create a table in your MySQL with that field or change the field name based on your current table. In our example, we will insert data into the CallInfo table.
I use “JSON.parse(resp.body).calls.forEach“ to get all records retrieved from API and create our SQL statement.
Finally, “connection.query“ runs our SQL statement and inserts data to the table.
Our final script with some additional parts is below:
const request = require('request')
const fs = require('fs');
const mysql = require('mysql');
var connection = mysql.createConnection({
host: ''
YOUR_MYSQL_SERVER_IP '',
user: 'root',
multipleStatements: true,
password: '10002000',
database: CALL
});
connection.connect();

var SavetoConfig = function(Data, cb) {
var obj = {
table: []
};
obj.table.push(Data);
var json = JSON.stringify(obj);

fs.writeFile('config.json', json, function(res) {
console.log('Done')
cb()
});
}

var ReadConfig = function(cb) {
fs.readFile('config.json', 'utf8', function readFileCallback(err, data) {
if (err) {
cb({
table: [{
offset: 0
}]
})
} else {
obj = JSON.parse(data);
cb(obj)
}
});
}

ReadConfig(function(res) {

var StartDate = "2019-3-21+00:00:00"
var EndDate = "2019-3-21+23:59:59"
var APIKey = "YOUR_API_KEY"
var Start = res.table[0].offset
var limit = 50
var URL = "https://api.pbxdom.com/Calls?access_token=" + APIKey + "&fromDate=" + StartDate + "&limit=" + limit + "&q=&reporttype=3&rptId=3&rptType=1&sortBy=callDateTime&sortType=asc&sortcoldef=0&start=" + Start + "&toDate=" + EndDate;
console.log(URL)
request.get(URL, {
timeout: 60000
}, function(err, resp) {
if (JSON.parse(resp.body).calls.length > 0) {
var TotalRecords = JSON.parse(resp.body).meta.totalCount;
var LastArrId = JSON.parse(resp.body).calls.length - 1
var LastRecNo = JSON.parse(resp.body).calls[LastArrId].id;
console.log('Total Records =>', TotalRecords, LastRecNo)
console.log(JSON.parse(resp.body).calls.length, " Records retrived")
if (Start + limit < TotalRecords || TotalRecords - Start < limit) {
if (TotalRecords - Start < limit) {
Start = TotalRecords
limit = 0
}
SavetoConfig({
offset: Start + limit
}, function(res) {

})

}

var sql = 'Insert into CallInfo (id,callDateTime,ring,callDirection,callTypeMapId,dialedPhone,callerPhone,callerName,ext,extName,duration,cost,spamStatus,co,coName) values '
var data = ''
JSON.parse(resp.body).calls.forEach(function(call) {
data = date + "(" + call.id + ",'" + call.callDateTime + "','" + call.ring + "'," + call.callDirection + "," + call.callTypeMapId + "," + call.dialedPhone + "," + call.callerPhone + "," + call.callerName + "," + call.ext + "," + call.extName + "," + call.duration + "," + call.cost + "," + call.spamStatus + "," + call.co + "," + call.coName + "), "
})
connection.query(sql + data, function(err, rows) {
console.log("Data inserted successfully to Mysql table")
});

} else {
console.log("No new records")
}

});
})
I added some additional code to prevent an error when the new data is not available. Now, you can customize that script and start using it.
You can add your script to the Linux Cron job to run every 5 minutes by adding this line:
*/5 * * * * node index.js
Finally, I hope this article can help you to write a smarter application for your organization. I’m sure that the scripts could be improved upon, but they are enough to get started, and I’m sure you will write better code than me when you get the idea.