 PBXDom
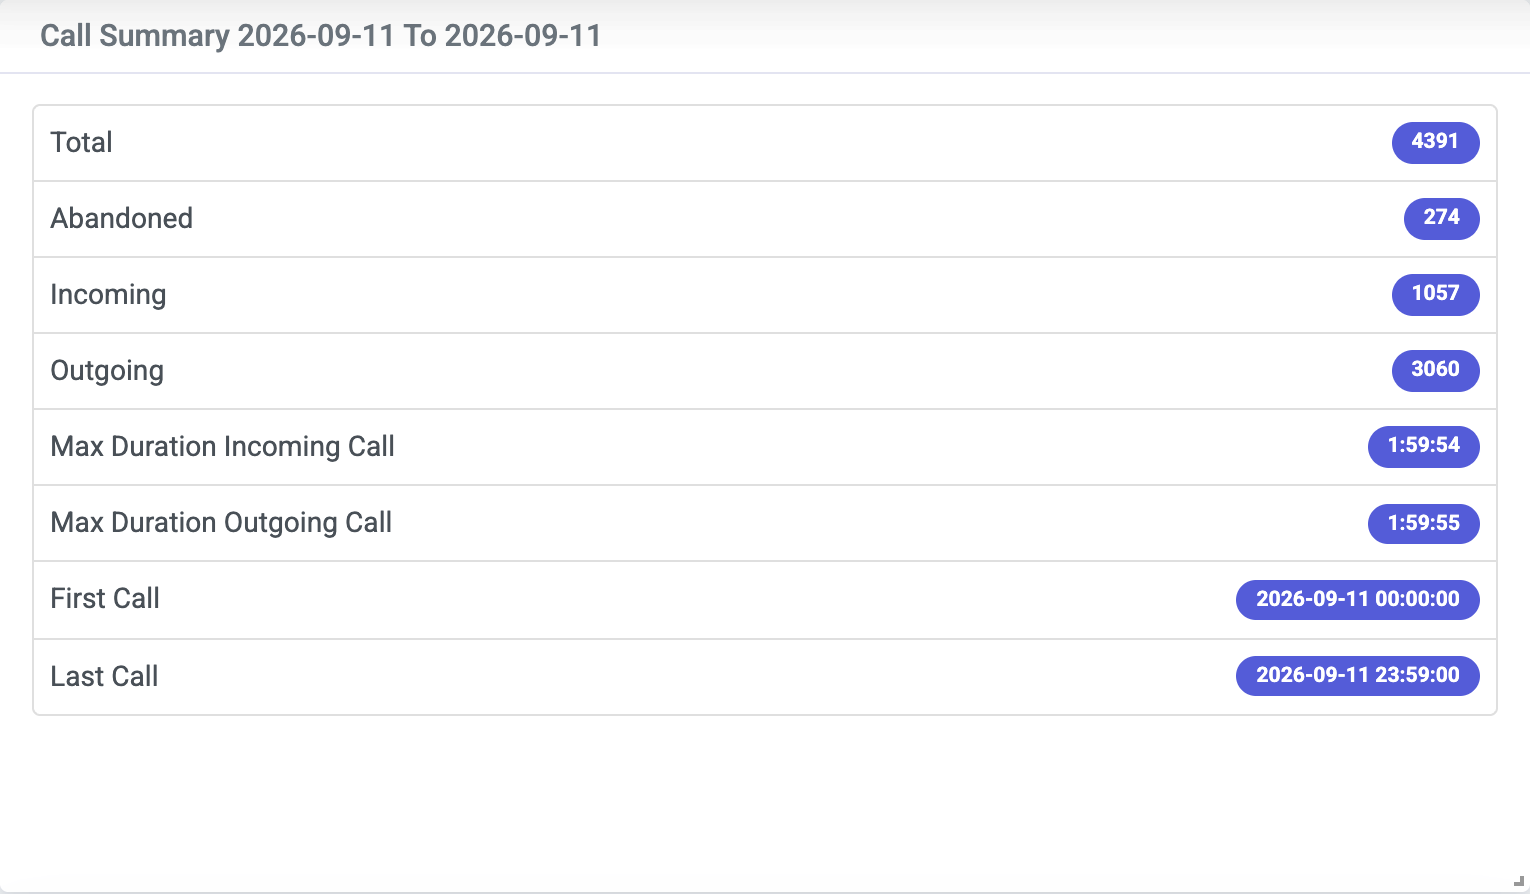
Above: an actual PBXDom interface capture with synthetic demo-account data, not a Cisco customer deployment. Open the summary full size.
A Cisco CUCM dashboard starts with reliable CDR delivery. CUCM produces the call records, a PBXDom collector receives them, and PBXDom turns them into call summaries, traffic charts and searchable history. This walkthrough covers that path and the test calls to make before trusting the totals.
Updated September 20, 2026. Configuration steps follow Cisco’s documented workflow; interface captures are from PBXDom’s demo account. Setup time depends on access, network configuration and the installed releases.
For report definitions and a comparison with Cisco’s built-in CAR, use the Cisco CDR reporting guide.
1. Prepare the collection path
Confirm your exact CUCM release through the Cisco compatibility check. This guide concerns CUCM billing-server file delivery; UCME, voice gateways and legacy Call Manager use different collection methods.
Have CUCM administration access, an always-on Windows collector host, and permission to configure the network path. The collector must receive Cisco’s reporting output and have outbound TLS access to PBXDom. Check the Cisco integration requirements and data architecture for the deployment you intend to use.
Data path: CUCM call records → billing-server file delivery → local collector → PBXDom dashboards.
Download the collector from the PBXDom download page, install it on the selected host, and follow your account’s current setup instructions to register it and select the Cisco system. Use the endpoint, protocol, credentials and destination directory configured for that installation. Match firewall rules to those settings; an old screenshot’s port list or default password is not a deployment specification.
2. Enable and deliver CUCM call records
In Cisco Unified CM Administration → System → Service Parameters, select a call-processing server and the Cisco CallManager service. Set CDR Enabled Flag to True on each relevant server. Enable CDR Log Calls with Zero Duration Flag when unanswered-call reporting is required, then save.
In Cisco Unified Serviceability, open Tools → CDR Management (CDR Management Configuration in Cisco’s guide). Add a billing application server using the collector’s configured host, credentials, protocol and directory. Confirm the destination settings against your collector configuration before saving.
These steps are based on Cisco’s CUCM 15 Initial Setup guide. Consult the corresponding guide for your installed release; FTP/SFTP support and authentication must match at both ends.
Make a completed test call and check that a new CDR file reaches the collector. Then find that call in PBXDom. Collector connectivity and successful call ingestion are separate checks. Update timing depends on record generation, file delivery and processing; a dashboard is not an instantaneous view of every active call.
3. Build a dashboard around a reporting question
Start with one phone system, one reporting day and a consistent time zone. In the dashboard, use Add Widget to select the views you need. The dashboard help explains the controls.
- Daily call activity: start with Call Summary and Call Traffic. Compare counts using the same date range and system filter.
- Missed customer calls: add an abandoned-call view, then inspect the individual records before treating each entry as a lost customer conversation.
- Team activity: use extension views after mapping extensions to the people or departments being compared.
The summary at the top shows 4,391 demo records: 1,057 incoming, 274 abandoned and 3,060 outgoing. The call-history capture below shows the same day’s 4,391 entries. This illustrates a basic reconciliation check, not a Cisco performance benchmark.
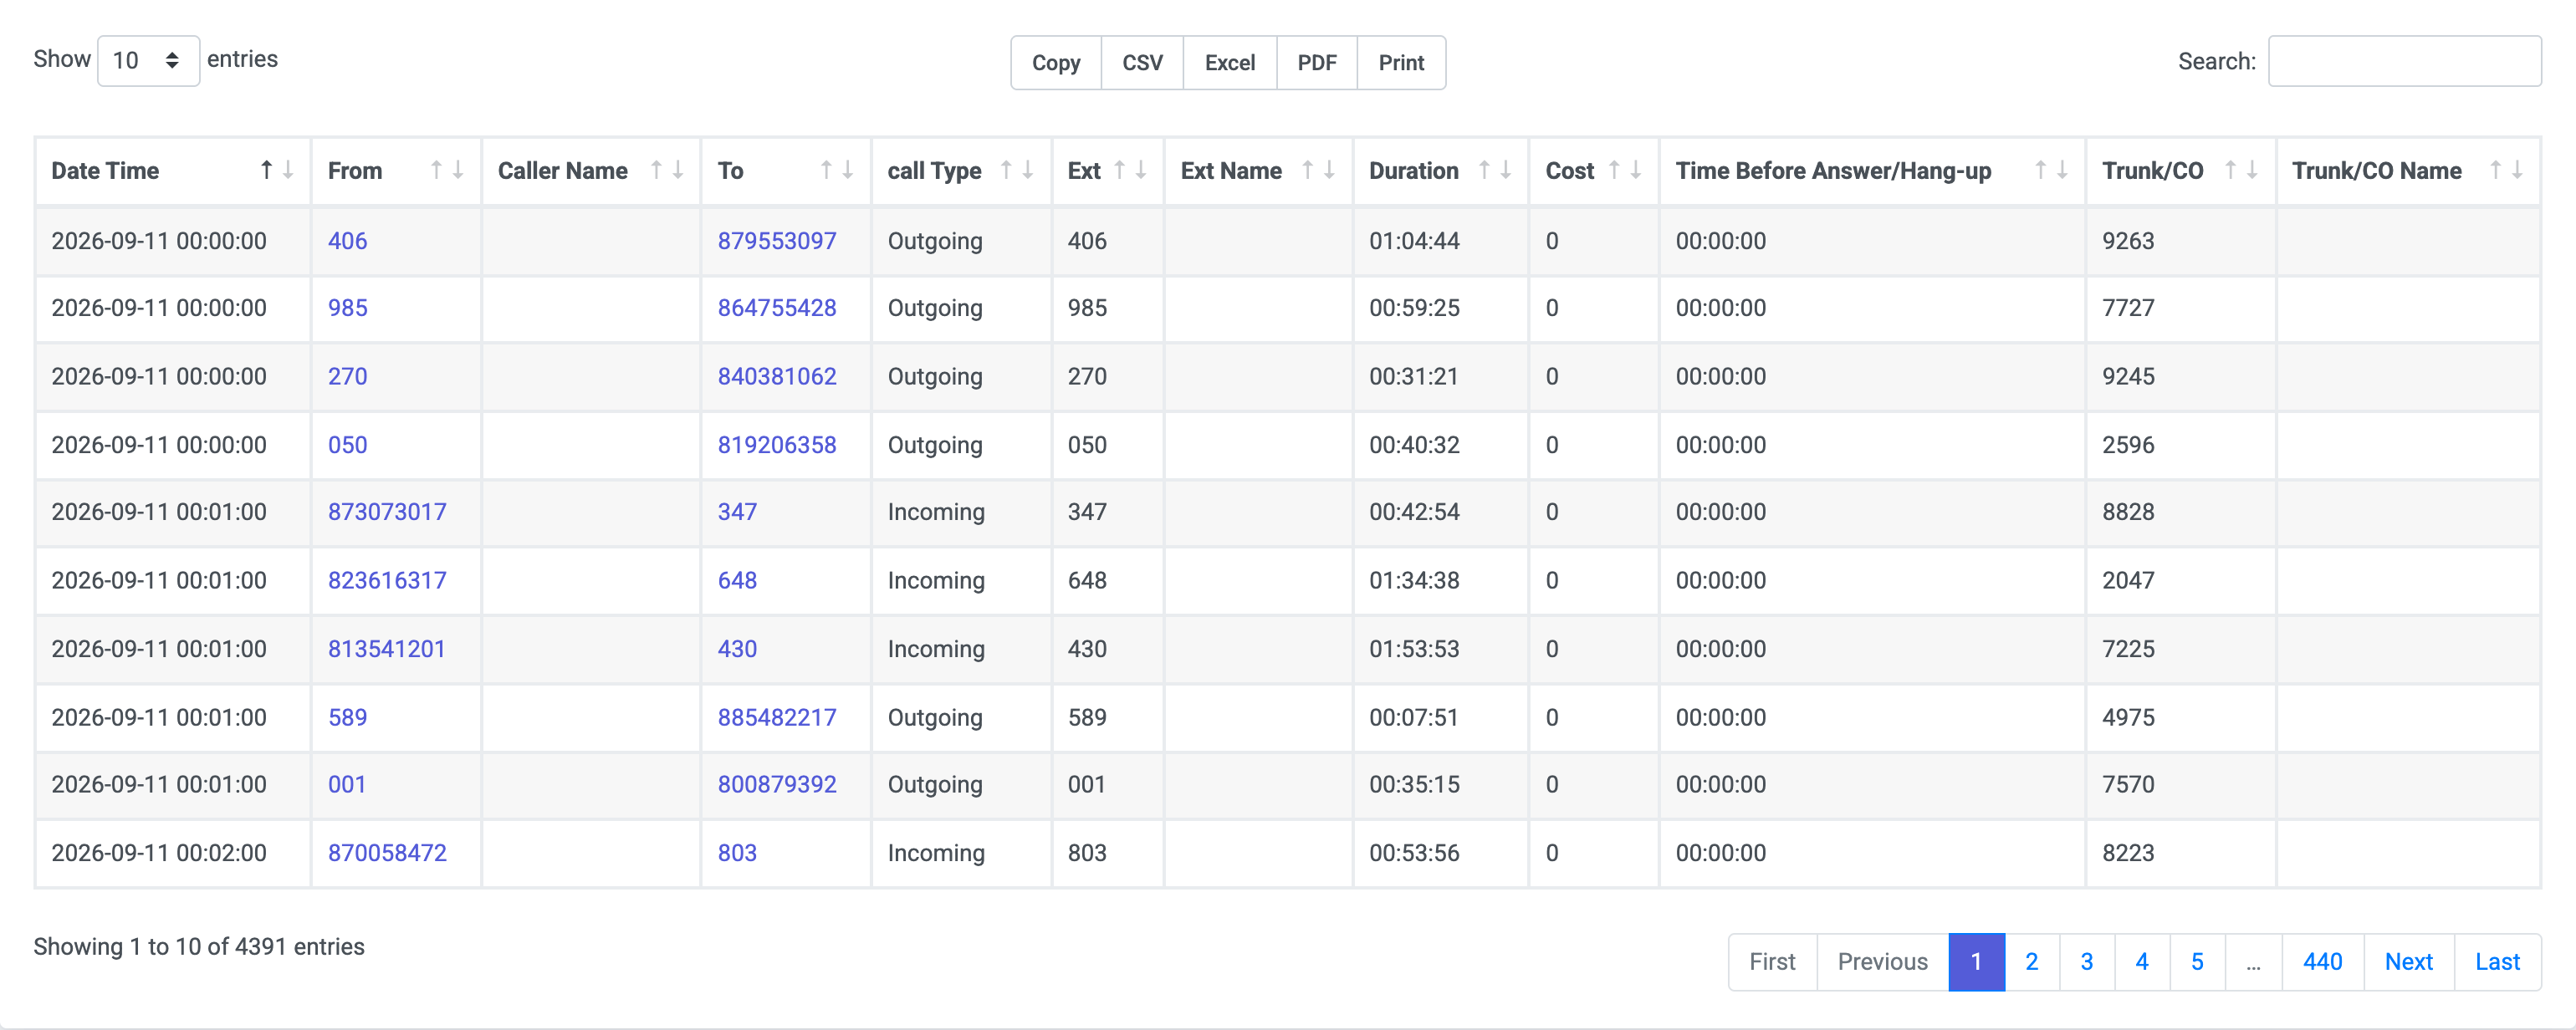
Actual interface, synthetic demo records captured September 12, 2026 for September 11. Open call history full size. Blank names and zero costs are retained; this example does not demonstrate configured call charging.
Use the call-history column guide to interpret the output. Available fields depend on the source records and configuration.
4. Validate answered, missed and transferred calls
Write down the time zone, caller, destination and expected result for each test. Use a short reporting window so the records are easy to find.
- Answered inbound: call a known extension and answer it. Check the numbers, extension, direction and connected duration in call history.
- Outbound: place a call from that extension. Check the destination and route, accounting for dial-plan number transformations.
- Unanswered: let a test call go unanswered. If it is absent, check zero-duration logging and delivery before changing dashboard filters.
- Transferred or hunted: answer a call and transfer it, or use a hunt-group scenario. Follow the related legs. An unanswered leg can belong to a conversation that was answered elsewhere; don’t equate every zero-duration row with a missed customer call.
Compare the dashboard with call history using identical filters. Decide whether the view counts records, attempts or complete conversations before comparing totals. See the missed-call investigation guide for the distinction between extension attempts and customer outcomes.
5. Diagnose an empty or unexpected dashboard
No calls: follow the path in order: CUCM generation, billing-server delivery, collector receipt, then report filters. Check the newest completed call and file timestamps. A connected collector with no incoming files points to a different problem from files arriving with no matching report rows.
Wrong reporting day: confirm the time zone and date range before comparing records near midnight. Use the Cisco CDR date conversion guide to understand the timestamps.
Unexpected counts: check cluster coverage and transferred or forwarded call legs. Missing names or costs: verify extension mappings and rate configuration; those values are not created simply by enabling CDR.
For a bounded investigation, export Cisco CDR/CMR records. For ongoing reporting, keep collection running and verify another reporting period before sharing the dashboard with colleagues.