 PBXDom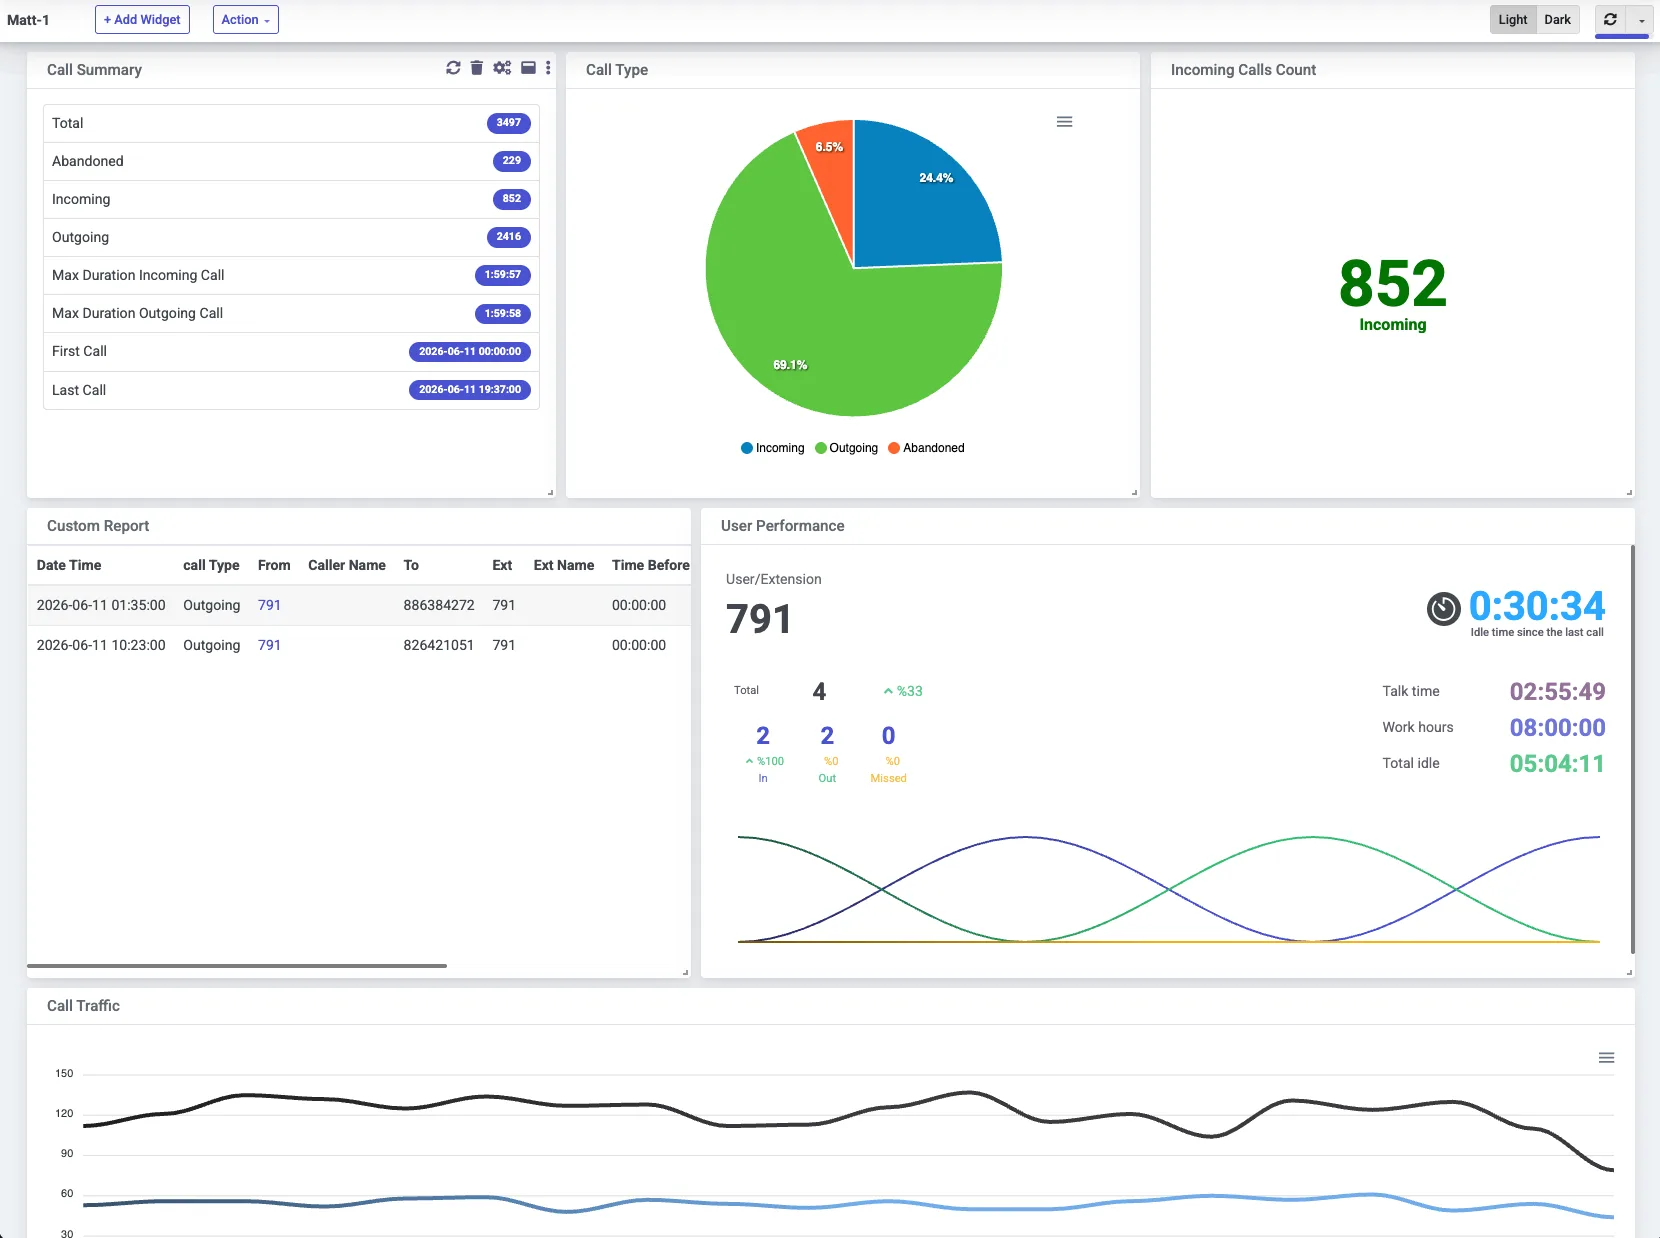
Continuous reporting for the 3CX system you already operate
3CX includes native call reports and also generates Call Detail Records for external systems. PBXDom uses that CDR output to maintain dashboards, searchable history, scheduled reports, and alerts without requiring someone to export a report each day.
The public PBXDom catalog exposes a 3CX General profile. It is not a promise of support for every numbered 3CX release or hosting arrangement. The exact deployment must allow the 3CX CDR service to reach an always-on Windows machine running the PBXDom collector.
What the 3CX dashboard shows
PBXDom uses the 3CX call stream for:
- incoming, outgoing, internal, and abandoned-call counts;
- missed calls with caller, time, extension, and call detail;
- extension and department activity;
- trunk utilization and call-volume trends;
- busiest-hour and answer-performance reports;
- daily, weekly, or monthly scheduled email reports;
- emergency-number and missed-call threshold alerts.
Review a complete call-history sample or open the abandoned-calls sample without creating an account. The dashboard above uses synthetic 3CX call records; the fields available from a real deployment depend on the enabled 3CX CDR fields.
When native 3CX reports are enough
Current 3CX releases include call logs plus queue, agent, ring-group, extension, and other operational reports. Authorized managers and system owners can schedule reports, and scheduled delivery includes a report link and CSV attachment. Start with those native reports when one 3CX system, its available templates, and its access model meet the requirement.
PBXDom is a separate reporting layer. It is useful when the operating requirement includes:
- one view across multiple 3CX instances or a mixed PBX estate;
- dashboards for people who should not administer the phone system;
- normalized history governed by a PBXDom retention plan;
- the same report definitions across sites or phone-system vendors;
- PBXDom alerts and scheduled reports driven by the collected call stream.
PBXDom does not replace 3CX administration, queues, routing, call recording, or the reporting features included with 3CX.
For the current native feature set, see the official 3CX call-reporting guide. 3CX also documents newer data-connector and Power BI options for eligible V20 deployments. Those are different architectures from PBXDom’s current CDR-socket workflow.
How 3CX connects to PBXDom
The current PBXDom setup uses the 3CX vendor, the 3CX General profile, and a LAN connection. In the documented arrangement, 3CX acts as the active-socket client and sends completed-call records to the collector’s IP address and configured TCP port. The collector then forwards normalized reporting data to PBXDom using its outbound cloud connection.
3CX CDR service
      │ active TCP socket
      ▼
PBXDom collector on an always-on Windows host
      │ outbound cloud connection
      ▼
PBXDom dashboards, reports, and alerts
Before setup, confirm:
- administrative access to the machine that will run the collector;
- a stable IP address or resolvable address for that collector;
- network and firewall reachability from 3CX to the collector’s listening port;
- access to the 3CX CDR configuration and output-field order;
- outbound internet access from the collector host.
The current PBXDom profile documents TCP port 3000 as its default listener. Confirm the value displayed during your setup instead of assuming it has not been customized. The official 3CX CDR documentation describes single-file, per-call file, passive-socket, and active-socket output and explains why the enabled field order must match the receiving application.
Follow the updated 3CX dashboard connection guide for the complete validation sequence.
Version and deployment boundaries
The 3CX General label means PBXDom maintains one public collection profile rather than a page for every 3CX release. It does not mean every release, license, or hosted network topology has been verified automatically.
Check these boundaries before installation:
- The deployment must expose configurable CDR output.
- 3CX must be able to open the configured active-socket connection to the collector.
- The PBXDom parser expects the field selection, order, and comma-delimiter behavior shown during setup.
- Transfers and other multi-leg calls can produce related records; validation must use completed test calls rather than a simple row count.
- PBXDom reads call records, not audio or phone-system configuration.
- The number of phone systems and the retained history depend on the selected PBXDom plan.
Validate the first records
After both sides are configured, make an incoming, an answered outgoing, and an unanswered test call. Confirm that the collector receives new records, then compare the time, direction, source, destination, answer state, and duration against the 3CX call log. Do not treat a connected socket alone as proof that the field mapping is correct.
For scheduled management reporting, see how to create a daily 3CX call report.
3CX reporting questions
Does PBXDom replace native 3CX reports?
No. Native 3CX reports remain available. PBXDom is an external layer for continuous dashboards, normalized history, cross-system reporting, scheduled reports, and PBXDom alerts.
Does the integration require direct database access?
The public PBXDom workflow uses 3CX CDR output sent to the collector. It does not require a connection to the 3CX production database.
Is every 3CX V20 update automatically supported?
Do not assume that from the 3CX General profile. Confirm the exact release, license, hosting arrangement, CDR availability, and network path in the compatibility check.
Why can a transferred call create more than one record?
3CX CDR includes identifiers and call-leg information used to reconstruct a call journey. Reporting logic must group related legs instead of treating every row as an independent customer call.
Evaluate with your own 3CX data
Check the 3CX deployment first. No email is required for the result. You can then create an account and follow the self-setup instructions or choose a guided connection session for the same 14-day trial.